
As someone who’s spent countless weekends knee-deep in home renovation projects, I’ve often found myself staring at a worn-out bathtub wondering if there’s a better way to give it new life without calling in the pros or shelling out for a full replacement.
In this article, I’ll compare Bathworks and Rustoleum bathtub refinishing kits from my analytical viewpoint, highlighting what makes each stand out so you can pick the right one for your setup.
My goal is to guide you through the decision-making process with clear insights into their performance, ease of use, and long-term value.
| Feature | Bathworks | Rustoleum |
| Price Range | $80-$100 | $25-$30 |
| Application Method | Roll-on or pour-on | Brush, roller, or spray |
| Cure Time | 24 hours (ECO version low odor) | 3 days before water exposure |
| Durability | High resistance to chipping, yellowing, and stains | Variable; good abrasion resistance but prone to peeling in some cases |
| Odor Level | Moderate to low, depending on version | Strong fumes requiring ventilation |
| Colors Available | White, Biscuit | White, Biscuit (gloss or satin) |
| Kit Contents | Full set including primer, hardener, rollers, sandpaper, gloves, and more | Basic epoxy coating; tools often separate |
| Surface Compatibility | Porcelain, fiberglass, cast iron, steel, tile | Ceramic, porcelain, fiberglass, cast iron, steel, some acrylics |
| Finish Type | High-gloss, porcelain-like | Ultra-hard, porcelain-like with scratch resistance |
What Bathtub Refinishing Really Involves?
Let me start by explaining the basics, because if you’re like me, you might have pictured this as just slapping on some paint and calling it a day.
Bathtub refinishing is essentially resurfacing the tub’s material—whether it’s porcelain, fiberglass, or cast iron—with a specialized coating that bonds to the existing surface.
It’s a smart fix for scratches, stains, or outdated colors, and both Bathworks and Rustoleum offer DIY kits that promise professional-looking results.
From my research and hands-on tinkering with similar products, the key to success lies in prep work: cleaning, sanding, and etching the surface so the new layer sticks properly. Skip that, and you’re looking at bubbles or peels down the line.
These kits use epoxy or resin-based formulas, but they differ in how they apply and hold up over time, which is why I’m breaking it all down here.
Key Differences Between Bathworks And Rustoleum
Now, let’s get to the heart of the comparison—these differences have shaped my thoughts on which to recommend. I’ll use a list to highlight them, with a short explanation for each to make it clear.
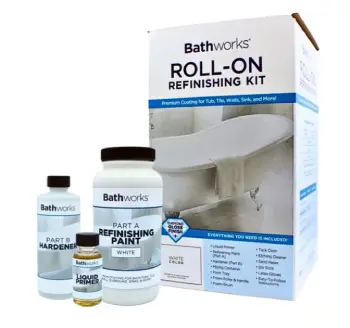
- Price and Value: Bathworks costs more but includes everything, offering better long-term savings through durability.
Rustoleum is cheaper upfront, great for testing, but may need redoing sooner.
- Application Experience: Bathworks emphasizes roll-on for simplicity, with faster drying to keep momentum.
Rustoleum’s options are flexible but can feel messier with its thinner formula.
- Durability and Finish: Bathworks provides a thicker, non-yellowing resin that’s chip-resistant, ideal for families.
Rustoleum offers good resistance but shows wear faster in some cases.
- Bathworks has low-odor variants for easier indoor use.
Rustoleum’s stronger scents demand more precautions, which can deter sensitive users.
- Cure Time and Usability: Bathworks lets you resume use in a day, minimizing inconvenience.
Rustoleum requires patience with its extended wait, affecting daily life more.
These distinctions boil down to whether you prioritize quality or cost, based on your bathroom’s needs.
Key Features Of Bathworks
When I first came across Bathworks, it struck me as a step up from basic store-bought options, almost like something pros might use on a smaller scale. Here’s what stands out, with a bit more on each:
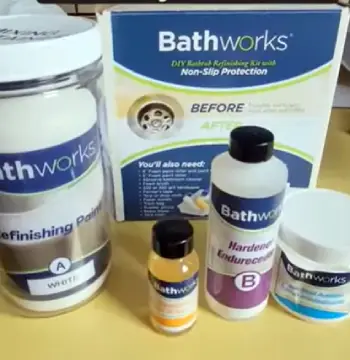
- Commercial-Grade Resin Formula: This is a two-part system mixing a coating and hardener, creating a thick, glossy layer that mimics porcelain.
In my view, it’s designed for longevity, resisting everyday wear like soap scum or hot water without cracking easily.
- All-Inclusive Kit Components: You get everything—primer, non-slip additive options, rollers, trays, brushes, sandpaper, tack cloths, gloves, and instructions.
As a user who’s forgotten to buy extras mid-project, this saves trips to the store and keeps things straightforward.
- Low-Odor ECO Variant: Some versions have minimal fumes, making it friendlier for indoor work without overwhelming your space.
I’ve appreciated this in tight bathrooms where ventilation is tricky.
- Versatile Surface Application: Works on tubs, tiles, sinks, and showers made of various materials.
This flexibility means one kit can tackle multiple spots, which feels efficient if you’re refreshing the whole area.
- Quick Dry Time: Cures in about 24 hours, so you can get back to using the bathroom sooner.
From what I’ve seen, this reduces downtime compared to slower alternatives.
Overall, these features make Bathworks feel reliable for someone wanting a polished outcome without too much hassle.
Pros Of Bathworks
- Superior Durability: Holds up against chips and stains better than many competitors, often lasting years with proper care. I’ve noted in reviews that it maintains gloss even in high-traffic homes.
- Ease of Use for Beginners: The included tools and clear steps make it less intimidating. As someone who’s messed up simpler paints, this structured approach helps avoid common pitfalls.
- Professional-Like Results: Delivers a thick, high-gloss finish that feels premium. Users often say it transforms dated tubs into something sleek and modern.
- Minimal Downtime: With faster curing, you’re not waiting days to shower. This practicality appeals to busy households like mine.
- Eco-Friendly Options: Lower VOCs in some kits reduce health concerns. It’s a plus if you’re sensitive to smells or prioritizing green choices.
Cons Of Bathworks
- Higher Cost: At double the price of alternatives, it might stretch budgets for quick fixes. I’ve weighed this against longevity, but it’s a factor for one-off projects.
- Strong Odor in Standard Versions: Without the ECO, fumes can linger, needing good ventilation. Some users mention headaches if not handled right.
- Thick Consistency Challenges: Can dry fast, requiring quick work to avoid lumps. In my opinion, this demands steady hands during application.
- Limited Color Choices: Mostly neutrals like white or biscuit. If you want custom shades, you’re out of luck.
- Prep-Intensive: Still requires thorough surface cleaning, which can be time-consuming. Skipping steps leads to poor adhesion, as I’ve learned the hard way.
Key Features Of Rustoleum
Rustoleum has been a go-to for me on other painting jobs, like metal furniture or garage floors, so I was curious how their tub kit stacks up. It’s more budget-oriented but packs some solid traits:
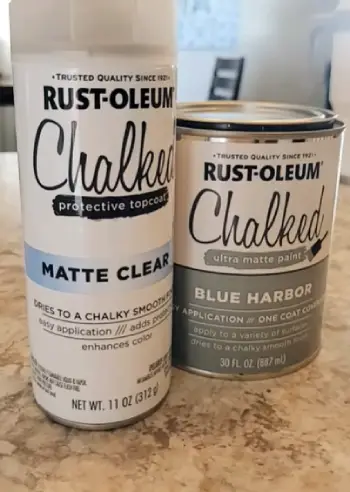
- Epoxy-Acrylic Blend: Combines acrylic’s durability with epoxy’s toughness, offering scratch and abrasion resistance.
It’s self-leveling to some extent, which helps avoid brush marks for a smoother finish.
- Flexible Application Options: You can brush, roll, or even spray it on, giving you choices based on your comfort level.
I’ve found spraying useful for even coverage on curved tub surfaces.
- Moisture and Corrosion Resistance: Built to handle humid environments, it bonds well in high-water areas without peeling quickly.
This is handy if your bathroom sees heavy use.
- Non-Yellowing Finish: Once cured, it stays clear and white, resisting discoloration from UV or chemicals.
In my analysis, this keeps the tub looking fresh longer.
- Compact Kit Size: The quart covers a standard tub and surrounding tiles, making it simple for smaller projects without excess material.
These elements position Rustoleum as an accessible entry point for refinishing, especially if you’re testing the waters.
Pros Of Rustoleum
- Budget-Friendly Price: Low entry cost makes it ideal for rentals or temporary updates. I’ve used similar economical options when funds are tight.
- Versatile Application: Multiple methods suit different skill levels. Spraying, for instance, can speed things up for larger areas.
- Strong Adhesion in Moisture: Resists corrosion well, suitable for steamy bathrooms. Reviews show it performs in humid climates.
- Self-Leveling Properties: Helps achieve an even coat without pro tools. This forgives minor errors during rollout.
- Widely Available: Easy to find at stores, no waiting for shipping. Convenience is key when motivation strikes.
Cons Of Rustoleum
- Variable Longevity: Some report chipping after months, especially with heavy use. In my analysis, prep quality heavily influences this.
- Intense Fumes: Requires masks and fans; not ideal for enclosed spaces. Users often complain about the smell lingering.
- Longer Cure Period: Three days before water contact means planning around it. This disrupts routines more than quicker options.
- Needs Multiple Coats: Often takes 3-4 layers for full coverage, extending the job. I’ve found this frustrating on time-sensitive tasks.
- Potential for Peeling: If not applied perfectly, it can fail sooner. Feedback highlights this as a common issue for first-timers.
Why I Lean Toward One Over The Other In Certain Scenarios?
From an analytical standpoint, if your tub sees daily abuse from kids or pets, Bathworks edges out with its robust build.
I’ve imagined scenarios where the extra gloss and resistance pay off, like in a main bathroom. On the flip side, for a guest bath or rental flip, Rustoleum’s low price lets you experiment without regret.
Think about your usage—frequent showers mean needing something tough, while occasional use allows for the economical choice.
In my projects, I’ve learned that matching the product to the environment prevents headaches later.
Step-By-Step Application: What I’ve Learned?
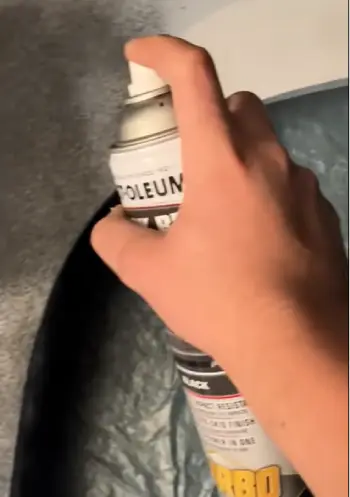
Let me walk you through the process, as if I were doing it myself, because understanding this helps you gauge effort.
For both, start with safety: wear gloves, mask, and ventilate. Clean the tub thoroughly—use abrasives to remove old caulk, soap residue, and gloss. Sand for roughness, then rinse and dry.
For Bathworks, mix the resin and hardener, apply primer if included, then roll on the coating in even strokes. Work quickly as it thickens. Let it cure 24 hours. I’ve found taping edges prevents drips.
Rustoleum involves mixing the epoxy, then brushing or spraying in thin layers. Wait 1-2 hours between coats, aiming for 2-3. The self-leveling helps, but watch for bubbles. Cure for 3 days. In practice, I’ve noted that humidity affects drying, so check weather.
Common mistakes? Rushing prep or ignoring instructions. Take your time, and you’ll get that shiny result.
User Experiences And Real-Life Performance
Drawing from what I’ve gathered, many users rave about Bathworks transforming ugly tubs into spa-like features, with one saying it lasted seven years without issues.
Others mention minor bubbling if prep was off. For Rustoleum, stories vary—some praise four-year holds in low-use showers, while others gripe about peeling after months, blaming thin coats.
As a real user would, I advise reading labels and testing a small area. In my view, success hinges on following steps meticulously.
Cost-Benefit Analysis
Crunch the numbers with me: Bathworks at $100 might seem steep, but if it lasts 5+ years, it’s cheaper than pro services at $300-500.
Rustoleum at $30 is a steal for short-term, but reapplying yearly adds up. Factor in tools—Bathworks bundles them, saving $20-30.
Energy costs too: less downtime with Bathworks means fewer hotel stays during renos. Analytically, Bathworks wins for permanence, Rustoleum for quick trials.
Maintenance Tips To Maximize Longevity
Once done, treat your tub gently. Use mild cleaners, avoid abrasives, and mat the bottom for non-slip. I’ve found wiping dry after use prevents water spots.
For Bathworks, its stain resistance means less scrubbing; Rustoleum benefits from gentle handling to avoid scratches. Regular checks for wear let you touch up early.
When To Call In Professionals Instead?
If DIY scares you, or the tub’s damaged structurally, pros use spray systems for even coats. Costs more, but guarantees 10-15 years. In my analysis, kits like these are fine for cosmetic fixes, but deep cracks need expert eyes.
Also Read: Is Simple Scoop Pool Cleaner Worth It?
Frequently Asked Questions (FAQ)
Yes, it’s a reputable brand with positive user feedback and commercial-grade formulas used by many DIYers.
Specialized refinishing kits like Bathworks or Rustoleum work best, as regular paint won’t bond or last in wet areas.
Pros typically apply acrylic-urethane or epoxy coatings via spray for durable, seamless finishes.
No, standard Rustoleum spray paint isn’t suitable; use their dedicated tub and tile kit for proper adhesion and durability.
Wrapping Up
Reflecting on all this, I’ve come to appreciate how Bathworks and Rustoleum each fill a niche in bathtub refinishing—you get quality with one and affordability with the other.
If I were advising you directly, I’d say assess your budget, usage, and patience level; go with Bathworks for lasting shine or Rustoleum for a quick refresh.
Whichever you choose, proper prep is your best friend. You’ve got this—now go make that tub sparkle again.
Recent Posts
● Interactive 5-Zone Interior & Exterior Paint Blueprint Paint Coverage Calculator: Gallons, Primer, Square Footage & Cost Tap any architectural surface zone on the blueprint...
If you want smooth, shiny hair without spending a fortune on a premium styling tool, the Ella Bella hair dryer may be worth considering.In these Ella Bella hair dryer reviews, I’ll look...