
I have spent years working on bathroom and kitchen renovations, and one decision that keeps coming up is which cement backer board to trust under tile.
My goal here is to walk you through a clear, practical comparison of Durock and Hardibacker so you can pick the board that matches your project’s demands for moisture, strength, ease of handling, and long-term performance without second-guessing the choice later.
| Feature | Durock | Hardibacker |
| Manufacturer | USG | James Hardie |
| Core Material | Portland cement + polymer-coated fiberglass mesh | 90% Portland cement + sand + cellulose fibers |
| Thickness Options | 1/4″, 1/2″, 5/8″ | 1/4″, approx. 0.42″ (often sold as 1/2″) |
| Weight (approx.) | 1/4″: 1.9 psf; 1/2″: 2.4 psf; 5/8″: 3.0 psf | 1/4″: 1.9 psf; 1/2″: ~2.6 psf |
| Flexural Strength | >1000 psi (1/4″); >750 psi (1/2″) | 2100 psi (1/4″); 1700 psi (1/2″) |
| Indoor/Outdoor Use | Both | Primarily indoor |
| Cutting Ease | More demanding (mesh creates dust) | Easier with printed grid lines |
| Edge Treatment | EdgeGuard to reduce crumbling | Standard edges, careful handling needed |
| Moisture Performance | Highly water-durable, mold-resistant | Moisture-resistant; HydroDefense version stronger |
| Typical Best Fit | Heavy-duty wet areas, outdoor, ceilings | DIY-friendly walls, countertops, floors |
Key Differences Between Durock And Hardibacker
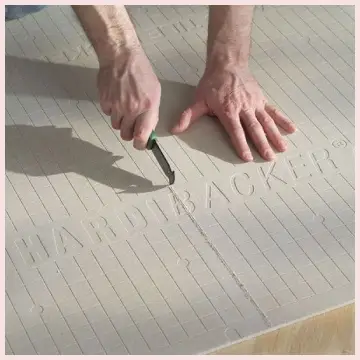
- Material composition and reinforcement method: Durock relies on a continuous polymer-coated fiberglass mesh that completely encapsulates the cement core.
Hardibacker uses cellulose fibers distributed throughout a high-cement matrix.
The mesh approach gives Durock excellent edge integrity and overall toughness, while the fiber approach gives Hardibacker higher flexural numbers and a cleaner cutting experience. Neither is purely better, and each trades one strength for another depending on the job.
- Weight and rigidity feel: On paper the weights sit close together, yet Durock often feels denser and more rigid in the hand.
Hardibacker flexes a bit more under its own weight when you carry a full sheet, which can make solo handling easier on walls but requires more care on floors to keep the panel flat.
I choose Durock when I want maximum stiffness, and I reach for Hardibacker when I prioritize easier positioning during a long day of work.
- Cutting and dust behavior: Hardibacker’s grid lines and fiber content let me score-and-snap with minimal dust in most cases.
Durock’s mesh produces more airborne particles and usually needs a carbide scoring tool or a powered saw with dust collection.
If I am working in an occupied house, Hardibacker reduces the mess, but if I am in a framed shell with good ventilation, the difference matters less and both boards stay practical.
- Approved use environments: Durock carries ratings for exterior applications. Hardibacker is specified for interior use.
That single line on the product literature decides the board for outdoor showers, covered porches, or any location that sees weather.
Inside the house both perform well once they are properly waterproofed and detailed at every joint.
- Cost and availability: Prices fluctuate by region and retailer, but the two boards usually sit within a few dollars of each other per sheet.
Availability can swing the decision more than pure cost. Some stores stock only one brand in the thickness I need, so I always check stock before finalizing the order and planning the rest of the materials.
Key Features Of Durock
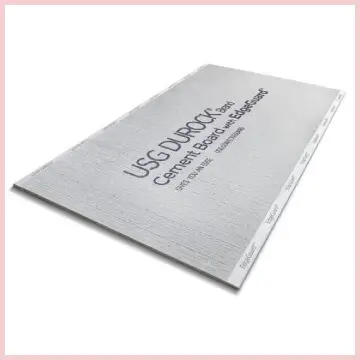
- Aggregated Portland cement core fully wrapped in polymer-coated fiberglass mesh: This construction gives the board its density and dimensional stability. The mesh runs across the faces and edges, which helps the panel resist cracking under point loads, and it keeps the edges from crumbling when you drive screws near the perimeter.
In practice I notice the board feels solid and does not flex much when I walk across a floor installation before tiling.
- EdgeGuard technology on the perimeter: USG designed this feature specifically to stop the common problem of edge spin-out and crumbling during fastening.
When I fasten a sheet of Durock, the screws bite cleanly without chewing up the edge the way older cement boards sometimes did.
That small detail saves time on clean-up and produces tighter joints that stay reliable over years of use.
- Available in three true thicknesses: The 1/4-inch version works well as underlayment over existing subfloors or for countertops where height buildup must stay minimal.
The 1/2-inch and 5/8-inch panels suit walls, ceilings, and heavier floor applications.
Having the extra thickness option matters when I need greater rigidity across wider stud spacing or when building a shower curb that must stay flat under stone tile.
- Rated for both interior and exterior use: This is one of the clearer practical advantages.
I have used Durock on exterior soffits and covered outdoor shower walls without worrying about the board breaking down from weather cycles.
The freeze-thaw resistance numbers support that claim, and the board will not delaminate even if it gets wet for extended periods.
Pros Of Durock
- Exceptional long-term stability in constant moisture: Once installed and tiled, the board does not soften, swell, or lose strength even if water reaches it through a failed grout joint. That reliability is why I reach for it on commercial-style showers or steam rooms where the surface stays wet for hours every day.
- Outdoor capability without special coatings: The same board that works in a bathroom also works on an exterior soffit or outdoor kitchen. I avoid carrying two different products on mixed indoor-outdoor jobs, and the freeze-thaw performance holds up through seasonal changes without extra protection layers.
- Strong resistance to edge damage: EdgeGuard reduces the number of damaged sheets and the amount of patching I have to do at joints. Clean edges mean cleaner thinset application and fewer weak spots that could show up later as cracks in the tile or grout lines.
- Multiple thickness choices for structural needs: When I need a thicker panel for ceilings or wider framing, the 5/8-inch option is ready. That flexibility keeps the installation within deflection limits without extra framing work, and it helps maintain a flat plane under large-format tile.
- Proven mold and mildew performance: Independent test ratings show zero growth under harsh conditions. In humid climates this matters as much as the water resistance itself, because it protects the assembly even if minor moisture finds its way behind the tile over time.
Cons Of Durock
- More demanding cutting process: The fiberglass mesh creates extra dust and requires sharper tools or power equipment. On small jobs the extra cleanup time becomes noticeable, and I usually set up a dedicated cutting station outdoors or with a vacuum attachment to keep the work area manageable.
- Heavier feel and less solo-friendly handling: Full sheets of the thicker panels demand two people for comfortable wall installation. Solo DIYers often struggle with positioning, especially when working on tall walls or ceilings where balance and reach become issues.
- Surface abrasiveness: The texture can scratch adjacent finished surfaces if the board slides against them during placement. Careful staging is required, and I always protect nearby cabinets or fixtures with drop cloths or cardboard before moving the panels into place.
- Slightly lower flexural numbers than Hardibacker: On floors with longer spans, the extra stiffness of Hardibacker can be an advantage. Durock still meets code requirements, but the published numbers favor the other board in pure bending strength, so I factor that in when the subfloor already has some bounce.
Key Features Of Hardibacker
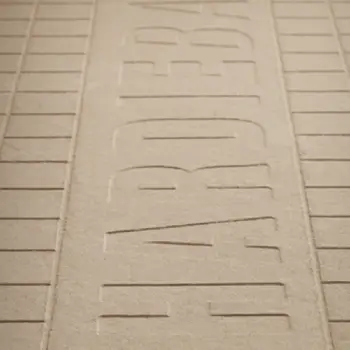
- High Portland-cement content blended with cellulose fibers: Roughly ninety percent of the board is cement and sand, with cellulose fibers providing internal reinforcement instead of a continuous mesh wrap.
The result is a panel that still resists moisture but feels slightly different under the knife and under load.
The cellulose also contributes to the MoldBlock additive that helps keep surface mold from taking hold in damp conditions.
- Printed grid lines across the face: These lines make scoring and snapping far more predictable.
I can mark a cut, score once or twice with a carbide knife, and break the board cleanly along the line.
That feature alone makes Hardibacker friendlier for solo DIY work or tight spaces where a circular saw feels awkward and creates extra mess.
- Higher published flexural strength: The numbers show 2100 psi on the thinner board and 1700 psi on the thicker version.
In real terms this means the panel can span framing members with less deflection under the weight of tile and thinset. I notice the difference most on floor installations over joists that are not perfectly rigid, because the board stays flatter and reduces stress on the finished surface.
- Lighter handling characteristics in many situations: Even though the weight per square foot is close to Durock’s, the absence of continuous fiberglass mesh makes the board easier to carry up stairs and position on walls.
The surface is also less abrasive, which matters when the board sits near finished enamel or vinyl surfaces during installation and could otherwise leave marks.
Pros Of Hardibacker
- Straightforward scoring and snapping: Grid lines turn cutting into a predictable process that almost anyone can master quickly. This reduces waste and frustration on first-time installs, and it lets me make accurate cuts without hauling a power saw into every tight bathroom corner.
- Higher flexural strength for the same thickness: Floors and walls see less deflection under tile weight. I notice fewer stress cracks in grout over time when the substrate stays flatter, and that performance holds up well under heavier stone or large ceramic formats.
- Cleaner handling and less abrasive surface: The board is kinder to surrounding finishes and produces less aggressive dust in many cutting scenarios. Cleanup stays simpler, which is a real benefit when the rest of the house is still occupied and I need to keep the mess contained.
- Good mold resistance with the added MoldBlock technology: Surface mold is less likely to start, which helps in bathrooms that stay damp between uses. The additive works together with the cement content to give an extra layer of protection that I appreciate in humid climates.
- DIY-friendly weight and size options: Many installers prefer the balance of strength and manageability, especially on vertical surfaces. Solo work becomes more realistic, and the panels feel less tiring to lift and hold in place while fastening.
Cons Of Hardibacker
- Primarily limited to interior applications: Outdoor or weather-exposed work is off-limits according to the manufacturer. That restriction forces a product change on mixed projects, so I plan ahead and keep Durock available when any part of the job faces the elements.
- Edges require more careful fastening: Without an EdgeGuard equivalent, screws placed too close to the edge can chip or spin out. Layout planning takes a bit more attention, and I mark fastener locations carefully so every screw lands in solid material.
- Standard version still needs a full waterproofing membrane in wet zones: The board resists moisture but does not replace a liquid-applied or sheet membrane in a shower. Skipping that step risks failure regardless of brand, so I treat the membrane as non-negotiable on every wet-area install.
- Slightly higher weight per square foot on the common 1/2-inch thickness: The difference is small, yet it adds up when moving dozens of sheets up multiple flights of stairs. I notice the extra effort on multi-story jobs and adjust my carrying technique or ask for help when the stack is large.
Installation Considerations That Affect Both Boards
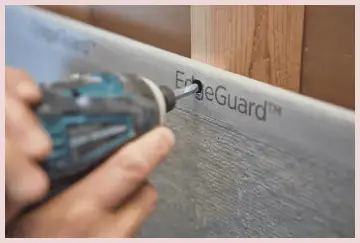
Both products install with corrosion-resistant screws or nails spaced according to the manufacturer’s schedule, usually every six to eight inches on walls and closer on ceilings.
Joints receive alkali-resistant mesh tape embedded in thinset. I always leave a small gap at the floor and at changes in plane so the board can move independently of the framing.
Framing must be flat and spaced correctly; no backer board can fix a wavy wall. For showers I apply a continuous waterproofing membrane over the finished backer board, paying special attention to corners, niches, and the curb. RedGard or equivalent liquid membranes work over either product. Sheet membranes also work if detailed carefully.
Fastener heads get covered with the same membrane so no metal remains exposed to moisture. Ignoring these steps is the most common reason either board fails, not the board itself.
Frequently Asked Questions (FAQ)
Hardibacker is a type of cement board. Between the two popular brands, the better choice depends on whether you need outdoor capability and maximum edge toughness (Durock) or easier cutting and higher flexural strength (Hardibacker).
Yes in wet areas such as showers. The board is moisture-resistant but not a complete waterproofing system by itself. A liquid membrane like RedGard or an equivalent product protects the assembly.
Both perform well when installed correctly and covered with a continuous waterproof membrane. Durock offers slightly more inherent water durability; Hardibacker offers easier handling. Proper detailing matters more than the brand name.
Cement board is the category that includes both Durock and Hardibacker. Either product is superior to ordinary drywall or plywood as a tile substrate in wet or high-load locations.
Final Thought
I wrote this comparison so you can stop guessing and start choosing with clear criteria.
Both Durock and Hardibacker will support a long-lasting tile installation when you match the board to the job, fasten it correctly, and protect it with a proper waterproofing layer.
You now have the material differences, strength numbers, handling realities, and real-world use cases in one place.
Pick the board that fits your framing, your moisture exposure, and the way you prefer to work, then focus your energy on clean joints and thorough waterproofing. That combination has kept my own tiled surfaces intact for years, and it will do the same for yours.
Recent Posts
Gerber Viper Vs. Avalanche: Which Toilet Actually Performs Better In Real Homes?
I spent weeks comparing the Gerber Viper and Avalanche after my old toilet started clogging every other week, and I wanted a clear answer on which one delivers better everyday performance without...
Acrylic Vs. Porcelain Tub: Which One Actually Wins For Daily Baths?
I set out to settle a bathroom renovation choice that kept me up at nights: acrylic versus porcelain tubs.After living with both materials in different homes and talking through real daily use...