
As someone who’s spent countless mornings experimenting with coffee brewers, I’ve often found myself comparing tools that promise the perfect pour.
In this article, I’ll share my hands-on insights on the Hario Switch versus the Clever Dripper, two immersion-style devices that have changed how I approach daily brews.
My main goal here is to help you decide which one fits your routine by breaking down their features, strengths, and quirks from a practical standpoint.
| Feature | Hario Switch | Clever Dripper |
| Brewing Method | Hybrid: Immersion and pour-over | Immersion with drip release |
| Material | Glass dripper with silicone base and stainless steel ball | Plastic body with paper filters |
| Capacity | 240ml (about 8 oz) | 300ml (about 10 oz) |
| Brew Time | 3-4 minutes immersion, quick drain | 2-4 minutes immersion, controlled release |
| Filter Type | Uses V60 paper filters | Uses #4 cone filters or reusable |
| Versatility | Switches between immersion and flow-through | Primarily immersion, some pour-over hacks |
| Price Range | $40-50 | $20-30 |
| Ease of Cleaning | Dishwasher safe parts, easy rinse | Simple rinse, occasional deep clean |
| Portability | Compact but glass is fragile | Lightweight plastic, travel-friendly |
What Makes These Brewers Stand Out?
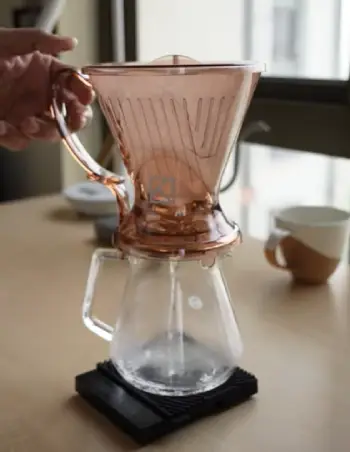
I’ve tested both the Hario Switch and the Clever Dripper in my kitchen, chasing that ideal balance of flavor and convenience.
The Hario Switch, part of the renowned V60 family, brings a clever twist to traditional pour-over with its immersion option.
It’s essentially a V60 dripper fitted with a silicone base that holds a stainless steel ball, allowing you to toggle between steeping grounds like a French press and then releasing for a clean pour.
This hybrid nature lets me control extraction in ways that feel intuitive after a few tries.
On the other hand, the Clever Dripper has been a staple for budget-conscious coffee lovers like me.
It’s a straightforward plastic cone with a valve at the bottom that opens when placed on a mug, letting the brew drain out after immersion.
No fancy switches here—just reliable steeping that extracts bold flavors without much fuss.
I appreciate how it mimics aspects of a pour-over but skips the constant pouring, making it forgiving for those rushed mornings.
From my experience, what draws people to these is their ability to produce cafe-quality coffee at home without needing pro-level skills.
The Hario feels more premium, with its glass construction giving a clear view of the bloom, while the Clever’s plastic build keeps things light and unbreakable.
Both shine in single-serve scenarios, but they’ve got distinct personalities that I’ll unpack further.
Key Differences Between The Hario Switch And Clever Dripper
Now, let’s pinpoint where these two diverge, drawing from my side-by-side tests.
- Brewing Style Flexibility: The Hario’s switch lets me alternate between immersion and direct pour-over, giving more control over flow rate. In contrast, the Clever is immersion-only by default, though some users hack it for pour-over by keeping the valve open—I’ve tried it, but it’s messier and less reliable.
- Material and Build Quality: Hario’s glass and silicone feel upscale and allow visibility, but they’re prone to breakage. The Clever’s all-plastic body is rugged and lightweight, ideal for travel or clumsy hands like mine, though it lacks that premium vibe.
- Capacity and Portion Size: With 240ml, the Hario suits solo sessions perfectly. The Clever’s 300ml edge means I can brew a bit more without scaling recipes, which is handy for afternoons when I need an extra jolt.
- Filter and Maintenance Needs: Hario sticks to V60 papers, which are widely available but specific. Clever uses more common #4 filters, and its valve requires occasional cleaning to avoid clogs—I’ve soaked mine in vinegar solutions to keep it smooth.
- Flavor Profile Outcomes: From my tastings, Hario often produces cleaner, brighter cups due to faster drainage. The Clever leans toward fuller-bodied brews with subtle sediment, reminiscent of French press but cleaner.
These differences boil down to preference: Hario for experimentation, Clever for reliability.
Key Features Of The Hario Switch
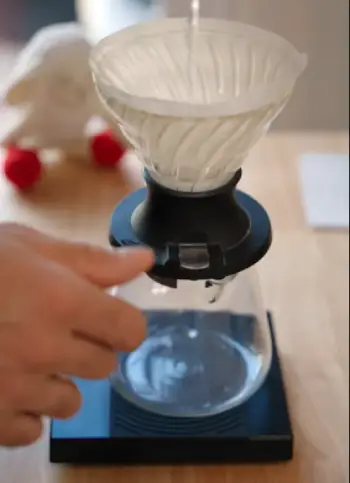
Let me walk you through what sets the Hario Switch apart, based on my daily uses.
- Hybrid Brewing Mechanism: The standout is that stainless steel ball in the base. When I flip the switch to “off,” it seals the dripper for immersion, letting grounds steep fully.
Switch to “on,” and it drains like a standard V60. This flexibility means I can experiment with steep times without over-extracting, often yielding brighter notes in lighter roasts.
- V60 Compatibility: It uses the same conical shape and paper filters as the classic V60, so if you’re already invested in that ecosystem, it’s a seamless add-on.
I’ve swapped filters between my setups, and the ribbed interior promotes even flow, reducing channeling issues I sometimes face with flat-bottom brewers.
- Compact Design: At about 4 inches tall, it fits neatly in my cabinet.
The glass body is heat-resistant, handling boiling water without cracking, and the silicone base grips surfaces well, preventing slips during pours.
- Aesthetic Appeal: There’s something satisfying about watching the coffee bloom through the transparent glass.
It adds a ritualistic element to my routine, making brewing feel less like a chore and more like a mindful start to the day.
In practice, these features make the Hario ideal for tinkerers. I’ve adjusted grind sizes from medium to fine, steeping for 3 minutes to pull out fruity undertones in Ethiopian beans, then releasing for a clean cup. It’s not just functional; it encourages creativity in your brews.
Pros of the Hario Switch
I’ve come to rely on the Hario for certain brews, and here’s why it shines.
- Enhanced Control Over Extraction: The switch mechanism lets me fine-tune steep times, avoiding bitterness.
In my trials with dark roasts, a 3-minute immersion followed by quick drain yields balanced flavors without muddiness.
- Seamless Integration with V60 Setup: If you own V60 gear, this extends it effortlessly.
I’ve used the same filters and servers, saving money and space in my coffee corner.
- Visually Engaging Process: Seeing the coffee interact through glass adds enjoyment. It’s like a mini science experiment each time, which keeps me engaged even on routine days.
- Quick Cleanup: Parts disassemble easily, and most are dishwasher-safe. After brewing, a rinse under the tap is usually enough, freeing up time for sipping.
- Portability for Light Travel: While glass is delicate, its compact size fits in bags. I’ve taken it on weekends away, brewing in hotel rooms with minimal hassle.
Overall, these pros make it a favorite for when I want to elevate my coffee game.
Cons of the Hario Switch
That said, it’s not perfect—here are the drawbacks I’ve encountered.
- Higher Price Point: At $40-50, it’s pricier than basic drippers. For beginners on a budget, this might feel steep, especially if you’re unsure about immersion brewing.
- Fragility of Glass: One accidental knock, and it could chip or break. I’ve been careful, but it’s not as forgiving as plastic alternatives.
- Learning Curve for Optimal Use: Mastering the switch timing takes practice. Early on, I over-steeped a few batches, leading to astringent tastes that turned me off temporarily.
- Limited Capacity: 240ml max means no big batches. If you’re brewing for groups, you’ll need multiple rounds, which interrupts the flow.
- Dependence on Specific Filters: V60 papers aren’t everywhere, so stocking up is necessary. I’ve run out mid-week and had to improvise, which isn’t ideal.
These cons highlight why it might not suit everyone right away.
Key Features Of The Clever Dripper
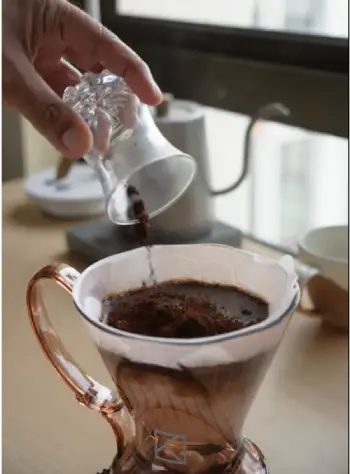
Shifting to the Clever Dripper, its simplicity is what hooked me initially.
- Valve Release System: The bottom valve stays closed until I set it on a cup, then gravity does the work.
This hands-off approach means I can multitask—grind beans, boil water—while the coffee steeps, typically for 2-4 minutes depending on my mood.
- Durable Plastic Construction: Made from BPA-free plastic, it’s tough enough for daily knocks.
Unlike glass, it won’t shatter if I drop it, which has saved me a few times during groggy mornings.
- Filter Versatility: It takes standard #4 filters, but I’ve used reusable cloth ones too.
The design allows full immersion, extracting more body and oils, resulting in a richer mouthfeel compared to pure pour-overs.
- Larger Capacity: Holding up to 300ml, it’s great for a bigger mug or sharing a brew.
I often make enough for two small cups, perfect when friends drop by.
What I love most is how forgiving it is. Even with inconsistent grinds, it delivers consistent results, making it a go-to when I’m not in the mood for precision.
Pros Of The Clever Dripper
The Clever has won me over in many scenarios with these strengths.
- Affordable Entry Point: Around $20-30, it’s accessible for newcomers. I started with it years ago, and it paid for itself quickly in saved cafe trips.
- User-Friendly for All Levels: No precise pouring needed—just add grounds, water, wait, and place on mug. This simplicity helped me build confidence before trying complex methods.
- Robust and Portable: Plastic withstands drops and packs easily. I’ve tossed it in backpacks for camping, brewing fresh coffee outdoors without worry.
- Consistent Results: The immersion extracts evenly, forgiving grind variations. Even with store-bought pre-ground, I get decent cups, which is rare for finicky brewers.
- Versatile Filter Options: Beyond papers, reusables work well, reducing waste. I’ve switched to cloth for eco reasons, and flavors remain punchy.
It’s a workhorse that delivers without drama.
Cons Of The Clever Dripper
Despite its appeal, there are trade-offs I’ve noted.
- Plastic Feel Lacks Premium Touch: It doesn’t have the elegance of glass or ceramic. For aesthetic-driven setups, it might look out of place on my counter.
- Potential for Valve Issues: Over time, the release can stick if not cleaned. I’ve dealt with drips mid-steep, requiring tweaks to keep it reliable.
- Slower Drainage in Some Cases: Depending on grind, flow can be sluggish, extending brew time. Fine grounds once clogged mine, leading to uneven extraction.
- Less Control Over Flow: No switch means committed immersion. If I want brighter notes, I have to adjust variables elsewhere, limiting experimentation.
- Bulkier Shape: Though lightweight, its wider base takes more storage space than sleeker options. In my small kitchen, it sometimes gets shuffled around.
These issues are minor but worth considering for picky users.
Brewing Techniques And Tips From My Experience
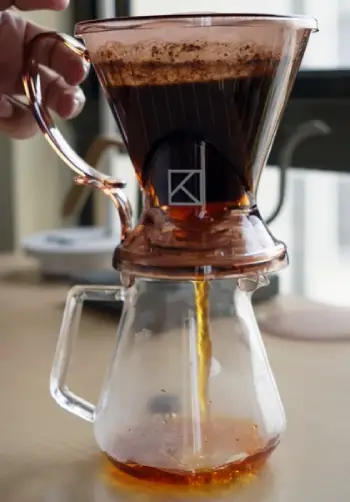
When I first got the Hario Switch, I treated it like my old V60, but quickly learned to embrace the immersion phase.
Start with 15g of medium-ground coffee, add 240ml of 200°F water, stir gently, and let it sit for 3 minutes. Flip the switch over your mug, and watch the magic.
This method pulls out nuanced layers—think citrus in Colombian beans—that pour-over alone might miss.
If you’re after bolder profiles, extend to 4 minutes, but stir midway to avoid flat spots.
With the Clever, my routine is even simpler: 18g coffee, 300ml water, steep 2-3 minutes, then drain. The key is a slight agitation at the start for even wetting.
I’ve found it excels with medium-dark roasts, delivering chocolatey depths without bitterness.
Pro tip: Preheat both devices with hot water to maintain temperature; it makes a noticeable difference in extraction.
In head-to-head brews, the Hario often edges out in clarity, while the Clever wins for body.
I once did a blind taste with friends—half preferred the Switch’s brightness, the rest the Dripper’s richness.
Experimenting like this has refined my palate, showing how small tweaks amplify flavors.
Flavor Profiles And Coffee Types Suited To Each
Analyzing outcomes, the Hario Switch tends to highlight acidity and fruitiness, making it my pick for single-origin light roasts. Ethiopian Yirgacheffe in the Switch? Explosive berry notes.
The quick drain filters out heaviness, leaving a crisp finish. For blends, it balances well, but avoid ultra-fine grinds to prevent clogs.
The Clever Dripper, with fuller immersion, suits robust profiles.
Brazilian or Sumatran beans shine here, with earthy, nutty undertones amplified. It’s less ideal for delicate florals, as extended contact can mute them, but perfect for iced coffee—steep longer, drain over ice for concentrated goodness.
I’ve logged dozens of sessions: Hario averages 8/10 for complexity, Clever 7.5/10 for consistency. Your bean choice matters—freshly roasted always elevates both.
Maintenance And Longevity Insights
Keeping these clean is straightforward, but habits matter. For the Hario, I rinse immediately post-brew, occasionally soaking the base in soapy water.
The glass stays spotless, and the ball mechanism hasn’t jammed in months of use. Longevity-wise, treat it gently; mine’s going strong after a year.
The Clever demands valve attention—weekly vinegar rinses prevent buildup. Plastic holds up well; my unit’s survived two years of heavy rotation without fading.
Both are low-maintenance compared to espresso machines, but consistent care extends their life.
Who Should Choose Which?
If you’re like me, valuing experimentation, go Hario—it’s rewarding for hobbyists. For straightforward, reliable cups, Clever fits busy lifestyles. Beginners? Start with Clever; veterans, upgrade to Switch.
Frequently Asked Questions (FAQ)
The V60 is a pure pour-over dripper emphasizing manual control and clean flavors, while the Clever combines immersion for fuller body with a valve release, making it more hands-off and forgiving.
Yes, its simple switch mechanism eases into immersion brewing, though some practice helps optimize results.
The Switch adds an immersion option via a base valve, offering hybrid versatility beyond the V60’s standard pour-over flow.
Its toggle switch for switching between steeping and draining sets it apart, blending immersion depth with pour-over clarity.
Wrapping Up
I’ve shared my real-world take on the Hario Switch and Clever Dripper to guide your choice.
Whether you lean toward the Switch’s innovative edge or the Dripper’s no-nonsense reliability, both can transform your coffee moments.
Give one a try—you might find, like I did, it sparks a new appreciation for your daily ritual.
Recent Posts
● Interactive 5-Zone Interior & Exterior Paint Blueprint Paint Coverage Calculator: Gallons, Primer, Square Footage & Cost Tap any architectural surface zone on the blueprint...
If you want smooth, shiny hair without spending a fortune on a premium styling tool, the Ella Bella hair dryer may be worth considering.In these Ella Bella hair dryer reviews, I’ll look...