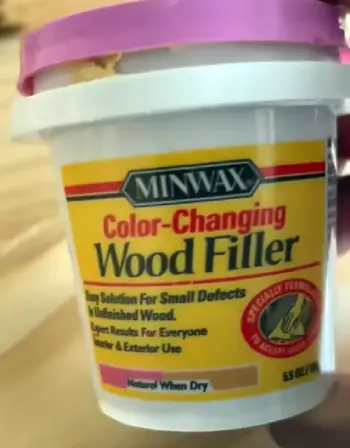
If you work on furniture repairs, cabinet touch-ups, flooring fixes, or DIY woodworking projects, I genuinely think Minwax High Performance Wood Filler deserves a spot in your workshop.
I’ve used plenty of wood fillers over the years, and this one stands out because it dries hard, sands smoothly, and holds up far better than many cheaper alternatives.
Whether you’re repairing cracked trim or rebuilding damaged wood corners, you’ll probably appreciate how durable and dependable it feels once cured.
If you want a wood filler that behaves more like real wood instead of soft putty, this product is absolutely worth considering.
My Personal Experience Using Minwax High Performance Wood Filler
The first time I used Minwax High Performance Wood Filler, I was repairing an old wooden side table that had cracked edges, chipped corners, and several deep nail holes.
I had already tried a lightweight filler from another brand, but the repair kept shrinking and cracking after a few weeks. That frustration pushed me toward Minwax.
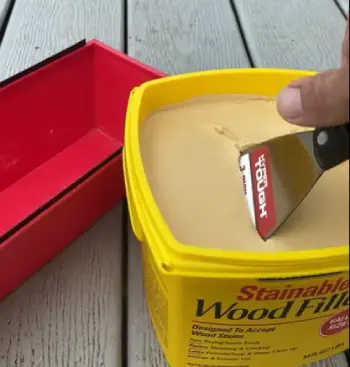
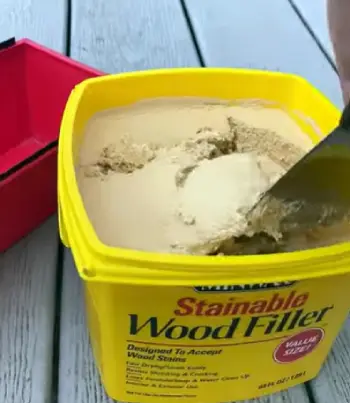
Right away, I noticed this product felt different. Instead of a soft premixed paste, it comes as a two-part filler system.
You mix the filler with a hardener, and then the chemical reaction starts quickly. That means you need to work fast, but it also means the final result becomes extremely solid.
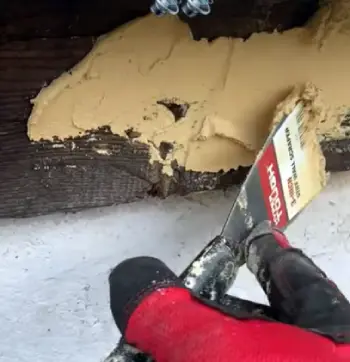
When I spread it onto the damaged wood, I immediately saw how thick and sturdy the consistency was. It didn’t sag or droop, even on vertical surfaces.
That alone impressed me because many fillers slide around and create a mess.
After curing, the repaired sections felt incredibly hard. Honestly, it felt closer to real wood than filler. I sanded the surface smooth, applied stain, and the repair blended surprisingly well.
I even drilled into one repaired section later, and it held without crumbling.
What I appreciated most was the confidence it gave me during larger repairs. Instead of worrying about shrinkage or weak spots, I felt comfortable rebuilding damaged areas properly.
That’s something I rarely say about standard wood fillers.
Of course, it wasn’t perfect. The fast drying time caught me off guard during my first attempt. If you mix too much at once, the filler hardens before you can finish spreading it.
I learned quickly to mix small batches.
The smell is also strong. You’ll definitely want ventilation when using it indoors.
Still, after several furniture restorations and trim repairs, I can honestly say this filler changed how I approach wood repairs. It feels more professional than most products you’ll find sitting on hardware store shelves.
What Makes Minwax High Performance Wood Filler Different?
One thing that separates Minwax High Performance Wood Filler from ordinary fillers is its solvent-based formula combined with a hardener.
Most casual DIY fillers are water-based and softer after drying. This product takes a more industrial approach.
When cured, the filler becomes extremely dense and durable. That strength matters if you’re repairing structural areas, corners, door frames, or spots that experience impact and movement.
Another major difference is stainability. Some wood fillers claim they accept stain well, but the final color often looks blotchy or artificial. Minwax performs better than average here, especially if you sand thoroughly before finishing.
You also get impressive versatility. I’ve used it on:
- Furniture restoration
- Window trim repair
- Cabinet corner rebuilding
- Hardwood floor patching
- Exterior wood repairs
- Door frame fixes
- Screw hole filling
That broad usefulness makes it feel like a serious workshop product rather than a quick cosmetic patch.
Pros Of Minwax High Performance Wood Filler
- Extremely Strong Final Finish
This is the biggest advantage by far.
Once cured, the filler becomes incredibly hard and durable. I’ve drilled into repaired areas, sanded aggressively, and even applied screws nearby without major issues.
If you’re repairing damaged wood that needs structural reliability, this strength becomes a huge benefit.
You don’t get that soft, chalky feel many cheap fillers develop.
- Excellent for Deep Repairs
Shallow cosmetic scratches are easy for almost any filler. Deep holes and damaged corners are where weaker products struggle.
Minwax handles major repairs impressively well.
I’ve rebuilt chipped table edges and restored rotted trim sections successfully using this product. Because it cures so hard, the repair feels trustworthy afterward.
That makes it valuable for serious woodworking repairs rather than simple cosmetic touch-ups.
- Minimal Shrinkage
Shrinkage drives me crazy during wood repair projects.
You apply filler, wait for drying, then discover the surface sank below the wood line. Suddenly you need another layer.
Minwax minimizes that issue significantly.
The filler stays relatively stable during curing, which helps create flatter and cleaner repairs from the start.
That saves time and frustration.
- Sands Smoothly
Although the cured filler becomes hard, it sands surprisingly evenly once you get started.
I’ve used fillers that crumble during sanding or leave uneven textures. Minwax behaves more consistently.
That smoothness matters if you want professional-looking results before staining or painting.
- Paints Very Well
If you’re painting furniture or trim, this product works wonderfully.
The repaired surfaces usually blend seamlessly under primer and paint. I’ve used it for painted cabinet repairs where the patched sections became nearly impossible to identify afterward.
That clean finish makes it appealing for home renovation projects.
- Long-Lasting Repairs
Durability is where this product earns its reputation.
I’ve revisited old repair projects years later and found the filler still intact. No major cracks, no sinking, and no softening.
That reliability creates trust in the product over time.
- Suitable for Indoor and Outdoor Use
Versatility matters when buying workshop products.
I appreciate that Minwax can handle both interior and exterior applications when properly sealed and finished.
That flexibility means you don’t need separate fillers for every project type.
Cons Minwax High Performance Wood Filler
- Strong Chemical Smell
This is easily the biggest complaint.
The odor can feel overpowering in small rooms. Sensitive users may find it unpleasant without proper ventilation.
It’s definitely not the kind of filler you casually use in closed indoor spaces.
- Fast Working Time
Beginners sometimes struggle with the short working window.
If you pause too long, the filler starts hardening before you finish shaping it.
That quick curing is useful for professionals but intimidating for first-time users.
- Harder to Sand Than Lightweight Fillers
Because the cured filler becomes extremely dense, sanding takes effort.
Some people prefer softer fillers because they sand faster. Personally, I think the durability tradeoff is worth it.
Still, you should expect extra sanding work.
- Can Be Messy During Mixing
The two-part system requires careful mixing.
If you rush or overmix, the process can become messy quickly.
Once cured, leftover filler becomes useless, so timing matters.
- Price Is Higher Than Budget Fillers
Minwax High Performance Wood Filler usually costs more than basic wood fillers.
However, I think the performance justifies the price, especially for demanding repairs.
Cheaper products often require repeated applications or fail sooner.
Tips For Minwax High Performance Wood Filler
- Always Prepare the Surface Properly
The quality of your repair depends heavily on preparation.
Before applying filler, I always remove loose debris, dust, old paint flakes, and weak wood fibers. A dirty surface weakens adhesion.
If the wood is damaged from rot or moisture, you should remove compromised material first before applying filler.
Clean surfaces produce much stronger repairs.
- Mix Small Batches Only
This is probably the most important practical tip.
The filler cures fast. Very fast.
If you mix a huge amount, you’ll waste product because it hardens before application. I learned this the hard way during my first project.
Small batches give you more control and reduce waste significantly.
- Use Proper Ventilation
The odor is strong and chemical-heavy.
Whenever I use this filler indoors, I open windows and sometimes use a fan. Wearing gloves also helps because the product can stick aggressively to skin.
Proper airflow makes the experience much more comfortable.
- Sand in Stages
Don’t jump directly into fine sanding.
I usually start with medium grit to shape the repair area, then switch to finer grit for smoothing.
This gradual approach creates cleaner finishes and avoids uneven surfaces.
- Prime Before Painting
Although the filler accepts paint well, I’ve found primer improves the final appearance.
Primer helps create consistent absorption and smoother color coverage.
That extra step makes painted repairs look more professional.
- Test Stain Before Final Application
Wood filler and natural wood absorb stain differently. Even good fillers can create color variation.
I always recommend testing stain on a hidden section first.
That quick test can save you from disappointing finishing results later.
- Store the Can Correctly
Exposure to air can dry out the filler over time.
After use, I clean the lid carefully and seal the container tightly. Proper storage extends the product’s lifespan and prevents waste.
- Avoid Overfilling Repairs
It’s tempting to apply excessive filler, but overfilling creates unnecessary sanding work later.
I usually slightly overfill damaged areas while keeping the surface manageable.
That balance saves effort during finishing.
- Wear Gloves During Application
This filler sticks aggressively to hands and tools.
Disposable gloves make cleanup much easier and keep the process cleaner overall.
Trust me, you’ll appreciate this tip later.
Comparing Minwax High Performance Wood Filler With Other Brands
- Minwax Vs DAP Wood Filler
DAP wood fillers are extremely common in DIY projects because they’re affordable and beginner-friendly. I’ve used DAP products several times, and they definitely have advantages for small cosmetic repairs.
DAP fillers usually feel softer and easier to spread. They also have less odor and longer working time, which makes them less stressful for casual users.
However, Minwax clearly wins in durability.
When I repaired furniture corners using DAP, the filler occasionally chipped under impact. Minwax repairs held up much better under pressure and sanding.
For quick decorative fixes, DAP works fine. For serious restoration work, I’d personally choose Minwax almost every time.
- Minwax Vs Bondo Wood Filler
Bondo and Minwax actually feel fairly similar because both use hardener systems.
Bondo is famous for automotive repairs, but many woodworkers also use it for wood restoration.
In my experience, Bondo hardens even faster than Minwax, which can feel stressful during larger repairs. It’s incredibly durable, though.
Minwax feels slightly easier to work with for woodworking applications specifically. The sanding and finishing process seems more natural on wood surfaces.
Bondo can sometimes feel excessively industrial for smaller furniture projects.
If you want a more woodworking-focused experience, Minwax feels like the safer option.
- Minwax Vs Elmer’s Wood Filler
Elmer’s fillers are very beginner-friendly.
They spread easily, clean up with water, and create less mess overall. For tiny nail holes and light cosmetic touch-ups, they’re convenient.
But durability is not even close.
Elmer’s fillers feel softer after curing and don’t hold up as well during structural repairs. I wouldn’t trust them for rebuilding damaged corners or filling large cavities.
Minwax operates on a much more professional level in terms of strength and long-term reliability.
- Minwax Vs Famowood
Famowood has a loyal following among woodworkers, and I understand why.
It spreads smoothly, dries relatively quickly, and accepts stain fairly well.
Compared side by side, though, Minwax still feels tougher after curing. The final hardness gives it an edge during demanding repairs.
Famowood may feel slightly easier to use for beginners, while Minwax feels more heavy-duty.
If you prioritize durability over convenience, Minwax tends to come out ahead.
Who Should Buy Minwax High Performance Wood Filler?
I think this product works best for people who want serious repair capability rather than quick cosmetic patching.
If you restore furniture, repair trim, fix damaged wood corners, or handle woodworking projects regularly, you’ll probably appreciate the durability.
DIY homeowners can also benefit from it, especially during renovation work.
However, if you only need to fill tiny nail holes occasionally, this product might feel excessive. Simpler water-based fillers could be easier for light household use.
This filler shines when strength truly matters.
Is It Beginner Friendly?
Honestly, partially.
The actual application process isn’t difficult, but the fast curing time can overwhelm beginners initially.
If you’re patient and mix small batches, you’ll adapt quickly.
I wouldn’t call it the easiest wood filler on the market, but it’s manageable with preparation.
After one or two projects, most users become comfortable with the process.
Frequently Asked Questions (FAQ)
Many professionals use Minwax, Bondo, Famowood, and DAP depending on the project type and durability requirements.
Yes, Minwax High Performance Wood Filler is widely respected for its strength, durability, and smooth finishing ability.
It typically begins hardening within minutes and can often be sanded in about 15 to 30 minutes depending on conditions.
DAP is easier for beginners and small cosmetic fixes, while Minwax is generally stronger and better for heavy-duty repairs.
Final Verdict
After using Minwax High Performance Wood Filler across multiple furniture restorations and repair projects, I understand why so many experienced DIYers and woodworkers trust it.
It’s strong, dependable, and far more durable than typical lightweight fillers. Yes, the smell is intense and the fast curing time requires practice, but the final results are genuinely impressive.
If you want repairs that feel solid and long-lasting instead of temporary cosmetic patches, I think you’ll be very satisfied with this product. For serious wood repair work, Minwax earns its reputation.