Are you struggling to find a wood finish that actually protects without looking like a thick plastic sheet? I have tested countless finishes, and I can confidently tell you that you should buy this product immediately. It bridges the gap between natural aesthetics and hardcore durability, transforming dull timber into a buttery, touchable masterpiece. If you want a reliable hardwax oil that respects the character of your wood while providing serious protection against daily wear and spills, this is the ultimate solution for your next project.
My Experience With Osmo Polyx Oil
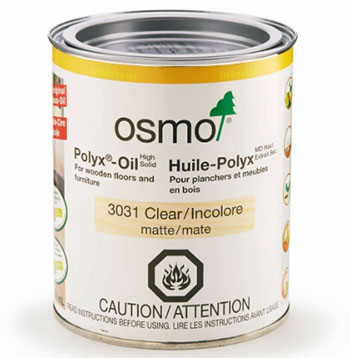
I remember staring at a beautiful, newly sanded black walnut dining table I had just spent three weeks building. The thought of slapping a cheap, glossy polyurethane on it felt like an absolute crime against nature. I wanted the grain to pop, and I wanted the tactile sensation of real wood under my fingertips when I sat down for a family meal. After scouring woodworking forums and reviewing professional advice, I finally pulled the trigger on a tin of the clear satin version.
When I first opened the can, I was genuinely surprised by the consistency.
It does not slosh around like thin mineral spirits, nor is it a thick paste. It has a unique, creamy texture that smells faintly of natural waxes rather than giving off aggressive, brain-melting chemical fumes.
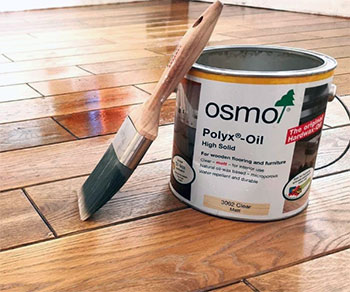
I grabbed a high-quality microfiber roller, poured a small amount into a tray, and started applying it to the tabletop. The first thing you notice is how far a tiny amount stretches.
You really have to fight the urge to flood the surface. I spread it incredibly thin, massaging it into the wood fibers, and watched the walnut instantly come alive with rich, dark chocolate tones.
The application process forced me to change my habits entirely.
With traditional varnishes, you lay it on thick and pray you do not get dust nibs. With this hardwax oil, you brush or roll it out aggressively until it forms a micro-thin layer.
I applied the first coat, walked away, and let it cure in my climate-controlled shop for roughly ten hours.
The next morning, I returned to find the surface dry to the touch but looking slightly thirsty in some spots where the softer wood grain had soaked up the oil. I applied a second, even thinner coat.
By day three, the table was ready for light use, and the results blew my mind. The finish felt like absolute velvet. It did not look like the wood was trapped under a sheet of glass; instead, it looked nourished and vibrant. Over the next six months, that table saw red wine spills, condensation from cold water glasses, and the general chaos of daily life. The finish repelled liquids beautifully. I could literally watch water bead up on the surface, waiting to be wiped away without leaving a permanent cloudy ring. I completely understand why high-end furniture makers swear by this stuff.
Read More: My Thoughts On Rust-Oleum Floor Tile Paint
Pros Of Osmo Polyx Oil
Let us break down exactly why this hardwax oil has earned such a massive cult following among professional woodworkers and DIY enthusiasts alike.
- Incredible Natural Aesthetic: Unlike traditional film-building finishes that sit on top of your timber like a plastic wrapper, this formula penetrates deeply into the wood fibers while leaving a micro-thin wax layer on the surface. This dual-action approach enhances the natural grain and color, bringing out a rich, warm depth without altering the fundamental texture of the wood. You can actually feel the grain when you run your hand across the table, providing a tactile experience that synthetic varnishes completely destroy.
- Exceptional Liquid Resistance: You might assume that a natural oil and wax blend would fail against harsh household spills, but that assumption is entirely wrong. Once fully cured, the surface becomes highly resistant to water, wine, coffee, and even cola. I have left condensation-heavy glasses on my finished surfaces for hours, and the moisture simply beads up. You just wipe it away with a dry cloth, and there is absolutely no ghostly white ring left behind. It is remarkably robust for a finish that looks so delicate.
- Unmatched Spot Repairability: This is arguably the biggest advantage over traditional polyurethane. If you scratch a varnished table, you usually have to sand the entire surface down to bare wood and start over to ensure the finish matches. With this hardwax oil, you can literally sand just the damaged spot, dab on a tiny amount of new oil, blend the edges, and let it cure. Once it dries, the repaired section integrates flawlessly with the surrounding finish, saving you hours of frustrating labor and material costs.
- Impressive Coverage Rate: While the initial price per can might induce a slight bit of sticker shock, the economics make complete sense once you start applying it. Because you are required to stretch the product incredibly thin, a single liter goes dramatically further than a liter of traditional varnish. You use a fraction of the liquid to cover the same square footage, making the actual cost per project surprisingly affordable. A small tin will easily finish a large dining table and several matching benches with plenty left over for future touch-ups.
- Low Odor And Safe Ingredients: Applying finishes indoors usually requires a respirator and open windows to prevent a headache from volatile organic compounds. This product utilizes purified natural oils like sunflower, soy, and thistle, combined with carnauba and candelilla waxes. The solvent used is a low-odor, benzene-free mineral spirit. You can easily apply it in your basement or a spare room without driving your family out of the house, and once fully cured, it is completely food-safe and suitable for children’s toys.
Cons Of Osmo Polyx Oil
Despite my overwhelming love for this finish, no product is absolutely perfect. You need to be aware of the inherent limitations and potential frustrations before you commit to using it on a massive project.
- Strict Application Requirements: You cannot simply slather this on with a cheap brush and hope for the best. The biggest mistake new users make is applying the oil far too thickly. If you leave excess product on the surface, it will fail to cure properly, resulting in a sticky, tacky, gummy mess that attracts dust and ruins the tactile feel. You have to be meticulous about spreading it thin and working it aggressively into the grain, which requires a bit more elbow grease than wiping on a thin lacquer.
- Vulnerability To Abrasions: While the resistance to liquid spills is top-tier, the resistance to sharp physical impacts and scratches is somewhat lower than a thick, two-part epoxy or heavy-duty floor polyurethane. If you drag a heavy, sharp ceramic bowl across the surface, it will likely dent or scratch the wax layer and the wood underneath. It is durable, but it does not create an impenetrable armor shell, meaning you still need to treat your wooden pieces with a reasonable amount of respect and care.
- Extended Full Curing Time: Although the surface might feel dry to the touch within eight to ten hours, the actual chemical curing process takes significantly longer. The manufacturer states that it takes roughly two to three weeks for the finish to reach its maximum hardness and protective capability. During this vulnerable window, you cannot use heavy chemical cleaners, place heavy objects on the surface, or expose the wood to standing water. You have to exercise extreme patience before subjecting your furniture to heavy daily abuse.
- Potential Wood Darkening: Because it is a penetrating oil, it will naturally deepen and darken the color of your timber. While this looks absolutely stunning on dark woods like walnut or mahogany, it can be problematic if you are working with pale species like maple or ash and want them to retain their raw, white appearance. The oil will impart a slight amber or yellowish hue to lighter woods over time. If you want to avoid this, you have to seek out their specific raw formulation containing white pigments.
- Specific Sanding Limitations: Traditional wisdom suggests sanding wood up to 320 or 400 grit for a glassy smooth finish. If you do that before applying this hardwax oil, you will effectively polish the wood and close the pores, preventing the oil from penetrating deeply. You must stop sanding at around 120 or 150 grit. For woodworkers obsessed with high-grit sanding, forcing yourself to stop at a lower grit can feel counterintuitive and requires a mental adjustment to trust the process entirely.
Maintenance Tips For Osmo Polyx Oil
To keep your beautifully finished surfaces looking fresh and repelling liquids for decades, you must adopt a specific, gentle maintenance routine. Treating this finish properly ensures it will age gracefully rather than degrading prematurely.
- Avoid Harsh Chemical Cleaners: You must immediately banish heavy-duty household degreasers, bleach-based sprays, and abrasive scouring powders from your cleaning routine. These aggressive chemicals will rapidly strip away the protective wax layer, leaving the raw wood underneath vulnerable to stains and moisture damage. You should only use pH-neutral cleaners specifically designed for oiled wood, or simply rely on a lightly damp cloth for everyday dusting and crumb removal.
- Wipe Up Spills Promptly: While the finish is highly water-resistant, it is not entirely waterproof in the same way solid plastic is. If you spill a glass of acidic red wine or hot coffee, do not let it sit overnight. The longer a puddle remains on the surface, the higher the chance it has to slowly break down the wax barrier and penetrate the wood fibers. Get into the habit of wiping up wet messes immediately with an absorbent towel to preserve the integrity of the protective layer.
- Utilize Liquid Wax Cleaners: Every few months, or whenever the surface starts looking a bit dull and thirsty, you should apply a specialized liquid wax cleaner designed for this exact finish. This product acts as an intensive maintenance treatment that cleans stubborn stains while simultaneously replenishing the micro-thin wax coating on the surface. You simply apply a very thin layer with a microfiber cloth, buff it lightly, and watch the original satin luster return instantly without needing a full sanding job.
- Implement Strategic Scratch Prevention: Since the finish does not offer a bulletproof physical barrier, you need to use basic common sense to prevent gouges. Always use coasters under hot mugs or sweaty cocktail glasses. Place felt pads on the bottom of heavy lamps, ceramic vases, or decorative metal centerpieces before setting them on the table. When writing on a single sheet of paper, always use a desk pad underneath to prevent the pressure of the pen tip from leaving permanent embossed indentations in the wood grain.
- Plan For Periodic Rejuvenation: Depending on the amount of traffic and abuse the surface sees, you will eventually need to refresh the main oil layer. For a dining table used heavily every single day, this might be required every two or three years. The beauty of this system is that rejuvenation does not require stripping. You simply give the surface a thorough cleaning, let it dry completely, and apply one incredibly thin maintenance coat of the original hardwax oil to restore the protection fully.
Comparison With Other Brands
When selecting the perfect finish for your masterpiece, you have to weigh the heavy hitters against each other. Here is how this popular hardwax oil stacks up against the major competitors on the market.
- Rubio Monocoat: This is perhaps the most famous direct rival in the hardwax oil category. Rubio Monocoat is renowned for its single-coat application process and utilizes a two-part system with an accelerator hardener. It bonds molecularly with the wood fibers in just one pass, making it incredibly fast for production environments. However, Osmo requires two coats and builds a slightly thicker wax layer on the surface. Many users find that Osmo provides a slightly silkier tactile feel and better long-term resistance to standing water compared to Rubio, though Rubio offers a vastly superior range of pre-mixed color options.
- Odie’s Oil: Odie’s Oil is another solvent-free, food-safe alternative that boasts incredible coverage rates and a pleasant citrus aroma. You apply Odie’s by buffing it aggressively into the wood and wiping off the excess completely. While Odie’s leaves a stunning, lustrous sheen that feels completely natural, it does not build the same level of surface film protection as Osmo. If you are finishing a decorative bowl or a jewelry box, Odie’s is fantastic, but for a high-traffic dining table, Osmo provides a much more robust, durable barrier against scratches and severe liquid spills.
- Minwax Wipe-On Poly: This is the budget-friendly, readily available film-building option found in every hardware store. Minwax provides excellent physical protection because it encases the wood in a layer of liquid plastic. It is cheap and easy to wipe on with a rag. However, it completely destroys the natural feel of the timber, leaving a synthetic, glossy appearance. Furthermore, if the Minwax finish gets scratched or damaged, spot repairing is nearly impossible without obvious witness lines, whereas Osmo allows for seamless, invisible touch-ups on damaged areas.
- Waterlox Original: Waterlox is a traditional resin-modified tung oil finish that penetrates deeply and builds a tough, elastic film over multiple coats. It provides arguably the best water resistance of any wiping finish, making it a favorite for wooden countertops and bathroom vanities. The major drawback is the horrifyingly strong chemical odor during application and the long, agonizing curing times between the required three or four coats. Osmo is vastly more user-friendly, smells significantly better, requires fewer coats, and still delivers more than enough water resistance for standard furniture applications without filling your shop with fumes.
Also Read: My Thoughts On Alien Draft Seal
Frequently Asked Questions (FAQ)
For raw, untreated wood, you must apply a maximum of two thin coats. Wood is porous, and the product is designed to penetrate these pores. Applying a third coat will cause the oil to sit on the surface, creating a tacky, sticky mess that refuses to cure properly and scratches easily.
Assuming you have applied the product thinly and evenly, and your room is well-ventilated with normal temperature and humidity, the finish will typically dry to the touch in roughly eight to ten hours. However, it takes approximately two to three weeks for the finish to reach its absolute final cured hardness.
Sanding between coats is generally not required or recommended for this specific product. As long as you applied the first coat thinly and the surface is free of dust nibs, the second coat will bond perfectly to the first. You only need to sand if the wood grain raised significantly.
The only recommended way to speed up the drying process is to increase natural air ventilation in your workspace. Opening windows and using a fan to keep fresh air moving over the surface aids the oxidation process. Turning up the heat excessively is not recommended as it dries the surface too fast.
Conclusion
Choosing the right finish dictates the entire future of your woodworking project, and this hardwax oil rarely disappoints. It strikes a phenomenal balance between preserving the authentic, raw beauty of the timber and providing serious, practical protection against everyday hazards. While the application process demands strict attention to thin coats and the initial curing phase requires patience, the long-term benefits are undeniable. The silky texture, the rich grain enhancement, and the effortless spot repairability make it a superior choice. You should confidently add this product to your finishing arsenal today.

Jeffery Carlson
I am Jeffery L. Carlson and you know the drill! I write for you and if you interact with me, please feel free to comment on any post you like!

