
I have spent years patching walls in my own home and helping friends with renovations, and the constant question that comes up is which product actually works better for the job at hand.
My goal here is to clear up the confusion between spackling paste and drywall mud so you can pick the right one without wasting time or money on the wrong repair.
| Aspect | Spackling Paste | Drywall Mud (Joint Compound) |
| Primary Use | Small holes, nail pops, minor surface fixes | Seams, large holes, taping joints, full wall repairs |
| Drying Time | Fast (often 30 minutes to a few hours) | Slower (several hours to overnight) |
| Shrinkage | Minimal | Moderate to noticeable, needs multiple coats |
| Texture After Drying | Harder, sometimes slightly brittle | Smoother and more flexible |
| Sandability | Easy but can clog paper if overdone | Excellent, produces fine powder |
| Best For | Quick touch-ups and furniture-level fixes | Structural seams and professional-looking walls |
| Application Thickness | Thin layers only | Can build thicker in stages |
| Cost per Volume | Higher for small tubs | Lower for larger buckets |
| Cleanup | Water-soluble when wet | Water-soluble when wet |
Key Differences Between Spackling Paste And Drywall Mud
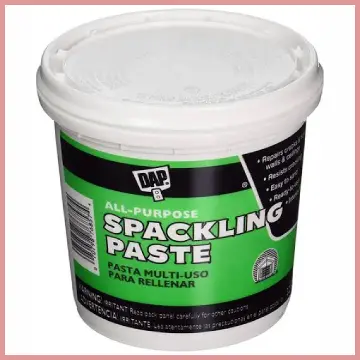
- Composition and additives: Spackling paste holds more lightweight fillers. It often includes vinyl resins. These keep weight low and cut shrinkage.
Drywall mud uses gypsum or limestone.
Binders in mud favor flexibility across wide areas. A dried sample of spackle feels denser in small spots. Mud feels more chalk-like on a seam.
- Working time and curing process: Spackling paste firms up within minutes. I work in small batches only. Drywall mud stays soft longer.
I can smooth edges over several feet. Setting-type mud hardens on a timer.
I must plan the mixed amount with care.
- Shrinkage behavior during drying: Nail holes rarely show pull-away with spackle. Taped joints always settle a bit with mud.
A second or third coat brings the surface level. Shrinkage forces extra coats on seams.
This is why single-coat work fails on joints.
- Structural role on the wall: Spackling paste sits on the surface. It simply fills voids. Drywall mud joins the system with tape.
It reinforces the joint. I treat them as separate tools. They are not interchangeable options.
- Volume and packaging: Spackling paste comes in small tubs. It suits spot repairs only. Drywall mud arrives in five-gallon buckets.
These fit room-scale work. Wrong size causes leftover waste or mid-job shortages.
- Surface hardness after full cure: Spackling paste dries harder in tiny patches. It can feel slightly brittle under pressure.
Drywall mud stays more flexible. It moves better with seasonal wall shifts.
- Dust level during sanding: Small spackle patches create little dust. Cleanup stays quick. Large mud jobs throw fine powder everywhere.
I seal rooms and use a vacuum.
Key Features Of Spackling Paste
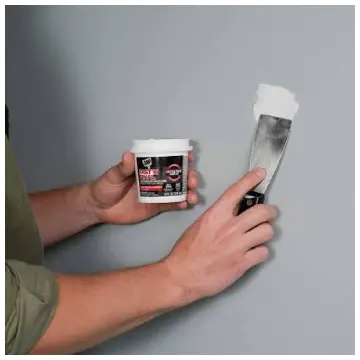
- Fast set time: Most formulas allow sanding within an hour.
Indoor conditions matter most.
I can patch, sand, and prime before dinner. Minor damage finishes in one session.
- Low shrinkage: The paste holds volume well on small fills. One application levels with the wall.
Sanding finishes the job. No deep dips appear later.
- Ready-to-use consistency: No mixing is needed. I open the tub and stir once. Application starts right away with a putty knife.
- Lightweight feel: Modern versions weigh less than older compounds. Vertical repairs feel less stress.
Dried patches crack less from minor movement.
- Limited build thickness: Thick layers risk soft centers. Outer skin dries first.
I keep coats thin. Build only after full curing if needed.
- Good grip on painted walls: Many formulas stick to existing paint.
A light scuff helps on glossy surfaces. Full scraping is rarely required.
- Small container convenience: The tub stores easily for months.
A tight seal prevents drying. Occasional users keep it ready on a shelf.
Pros Of Spackling Paste
- Speed of repair: Small jobs finish in one session. Quick dry time keeps projects moving. A few nail holes take little effort.
- Minimal dust during sanding: Small volume means less mess. I vacuum and wipe with a damp cloth. Cleanup ends in minutes.
- Good adhesion on painted surfaces: Many formulas grip existing paint. Light scuffing improves results. Full removal is seldom needed.
- Convenience for occasional users: Small tubs store for months. Sealed well, they stay usable. One picture-hanging session needs no large bucket.
- Reduced risk of over-application: Thick consistency stays in place. Less product lands on the floor. Waste drops on every job.
- Easy transport and storage: Light weight and small size fit any toolbox. I carry it room to room without strain.
- Low skill barrier: Beginners fill small holes with little practice. Results look acceptable after light sanding.
Cons Of Spackling Paste
- Not suitable for large areas: Fist-sized holes or long seams crack easily. Flexibility is low over wide spans. Weak spots appear later.
- Potential for harder sanding residue: Some brands dry glassy. Extra effort blends the ridge. Finer grit paper helps.
- Higher cost for volume: Multiple small tubs cost more. A growing repair list hurts the budget. Bulk mud wins on price.
- Limited structural strength: Spackle fills but does not reinforce. High-traffic walls can separate the patch. Ceilings that flex show problems first.
- Sensitivity to thick layers: Deep fills in one go stay soft inside. Surface cracks form. Thin coats with patience are required.
- Shorter shelf life once opened: Air exposure hardens the paste faster. Tight sealing is mandatory. Leftovers can waste.
- Less forgiveness on uneven surfaces: Thin coverage shows high spots. Extra sanding becomes necessary.
Key Features Of Drywall Mud
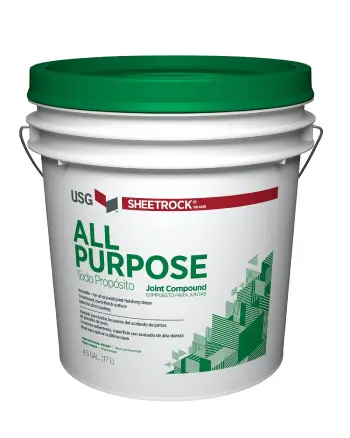
- Excellent workability: The mud spreads smoothly under a wide knife. It stays open long enough.
I feather edges several inches past the repair.
- Strong bonding with tape: Paper tape embeds into the first coat. A continuous membrane forms.
Future cracking drops sharply.
- Multiple formula options: Lightweight mud reduces ceiling weight. Setting-type handles humid rooms.
Topping compound gives a finer final coat.
- Superior sanding characteristics: Dry surface powders finely under 120-grit paper.
The finish disappears under paint. Results look cleaner than many spackle patches.
- Ability to build volume: Successive coats fill deeper voids. Uneven edges level out. Each layer must dry fully. The result stays solid.
- Adjustable thickness by water: I thin the mix for finish coats. Thicker mixes suit base layers. Control stays in my hands.
- Wide availability in bulk: Five-gallon buckets lower cost per use. Large projects stay affordable. One open bucket serves many rooms.
Pros Of Drywall Mud
- Versatility across project sizes: Single seams or entire rooms use the same product. One bucket covers many tasks.
- Professional-grade finish potential: Proper layers and sanding create smooth walls. Paint or texture hides the repair completely.
- Cost efficiency on larger jobs: Bulk packaging drops the price per gallon. Full renovations save real money.
- Compatibility with tape and mesh: Embedded reinforcement moves with the house. Temperature swings cause fewer cracks.
- Adjustable formulas for conditions: Setting-type works in damp weather. Lightweight eases overhead strain. Options match the room.
- Strong long-term durability: Well-taped joints last through years of settling. Seasonal movement is absorbed better.
- Easy to texture match: Additives create orange-peel or knockdown finishes. Existing walls blend without sharp edges.
Cons Of Drywall Mud
- Longer project timeline: Multiple coats need full drying. A simple patch stretches into days. Planning around that is essential.
- Greater mess potential: Large sanding jobs create fine dust. It settles everywhere. Room sealing and HEPA vacuuming help.
- Learning curve for smooth application: Beginners leave ridges or overfill edges. Practice with light pressure improves results. Wide knives take time to master.
- Shrinkage requires extra coats: One coat never stays level. Two coats plus a skim are standard. Skipping steps shows later.
- Storage and waste issues: Opened buckets dry out or grow mold. Airtight containers and date labels reduce loss.
- Heavier physical demand: Wide knives and large areas tire the arms. Overhead work feels harder than small spackle jobs.
- Humidity sensitivity on open time: High moisture slows drying. Low moisture can skin the surface too fast. Room conditions need monitoring.
When I Choose Spackling Paste?
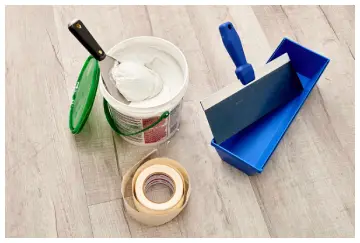
I grab the spackle tub for nail holes, screw pops, and small dents under two inches across.
The product shines when speed matters and the damage stays surface-level.
After hanging a gallery wall I walk the room with a putty knife and a small container, filling every mark before the paint has time to dry on the previous patch.
The same approach works for rental touch-ups before moving out. Landlords rarely notice the difference once the wall is painted.
When I Choose Drywall Mud?
Any time the repair involves a seam, a hole larger than a fist, or new drywall installation, I open the joint compound.
Taping corners, covering butt joints, and rebuilding water-damaged sections all demand the strength and workability of mud.
I also use it when I need to texture-match an existing wall. The mud accepts additives for orange-peel or knockdown finishes more reliably than spackle.
Application Tips From Experience
For spackling paste I keep the knife clean and apply pressure only enough to force material into the void. Excess on the surface comes off with a second pass.
I sand with a light touch once the patch feels hard, then wipe dust before priming. A quality primer seals the patch so paint does not flash differently over the repair.
For drywall mud I mix setting-type powder to a peanut-butter consistency for the first coat and thinner for the finish coat.
I load the knife evenly and pull long strokes to feather the edges. Between coats I sand only the high spots rather than the entire area, which reduces dust and preserves the flat plane.
A damp sponge can knock down minor ridges without generating powder.
Temperature and humidity affect both products. I avoid applying either when the room sits below 50 degrees or above 90, and I run a fan for air movement without pointing it directly at wet compound. Direct airflow can cause surface cracking.
Common Mistakes I Have Made And Seen
Rushing the dry time ranks highest. I once painted over still-soft mud and watched the paint wrinkle within hours.
Skipping the scuff-sand on glossy paint caused spackle to peel later. Applying mud too thick in one coat created deep cracks that required digging out and starting over.
Using the wrong knife size left ridges that showed under light. I now keep a six-inch and a twelve-inch knife within reach and switch based on the repair width.
Analytical Look At Performance Over Time
After living with both products for more than a decade, I notice that well-applied drywall mud on seams lasts longer under seasonal expansion and contraction.
Spackling paste on isolated holes holds up equally well if the surrounding drywall remains stable. In homes with significant settling, the taped mud joints flex without failing while isolated spackle patches can develop hairline cracks at the edges.
Paint adhesion remains comparable once both surfaces receive the same primer. Cost analysis favors mud for any project beyond a handful of small fixes, while convenience favors spackle for quick maintenance.
The chemical difference also matters. Setting-type mud forms a harder crystal structure that resists moisture better in bathrooms.
Lightweight spackle can soften slightly in high humidity if the original formula lacked strong binders. I test new brands on a scrap piece of drywall before committing them to a visible wall.
Frequently Asked Questions (FAQ)
Use spackling for small holes and drywall mud for seams or larger repairs.
A few drops improve workability and reduce bubbles for smoother application.
No, it lacks the strength and flexibility needed for taped joints.
The surface may be too glossy, dusty, or damp; clean and scuff first.
Wrapping Up
I wrote this guide so you can walk into any hardware aisle and choose with confidence instead of guessing.
Spackling paste and drywall mud each solve different problems, and matching the product to the damage saves both time and frustration.
Next time a wall needs attention, measure the size of the problem first, then reach for the right container.
Your finished surface will look better, last longer, and cost less in the long run when you apply what I have learned through years of trial and error.
Recent Posts
I spent months comparing budget options against established names after my last set of tires wore out sooner than expected.My goal here is to share what I learned from putting Dextero and...
AquaTru Carafe Vs. Classic: Which Is Actually Fits Your Kitchen?
I decided to write this comparison after months of testing both the AquaTru Carafe and the Classic in my own kitchen. Tracking covered daily use.Taste stayed consistent. Refill frequency...