
If you are planning a tattoo, cosmetic procedure, laser session, or any skin treatment that involves discomfort, I can tell you from personal use that choosing the right numbing cream changes everything.
Zensa numbing cream stood out to me because it promised strong relief without making my skin feel irritated or overly greasy.
I decided to try it when I was preparing for a long tattoo session, and honestly, I was curious if it could truly reduce pain the way people claimed.
In this review, I’ll share my real experience, how it performs compared to other popular brands, and whether it is actually worth your money.
My First Experience Using Zensa Numbing Cream
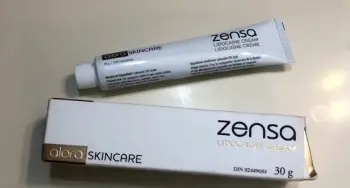
The first time I used Zensa numbing cream, I was honestly a bit skeptical. I’ve tried other topical anesthetics before, and most of them either worked weakly or wore off too quickly.
This time, I applied Zensa about 45 minutes before my tattoo appointment.
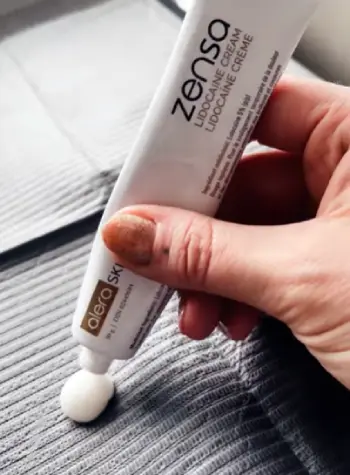
The texture immediately felt different from cheaper alternatives—it was smooth, not overly thick, and spread evenly without leaving a sticky layer.
What surprised me most was how quickly I started feeling a mild numbness. Within 20 to 30 minutes, the area felt noticeably desensitized.
By the time my tattoo artist began working, I could still feel pressure, but the sharp pain that usually makes you tense up was significantly reduced.
During the session, I paid close attention to how long the effect lasted. I’d say the strongest numbing period lasted around 1.5 to 2 hours, which was enough for most of the detailing work.
There was a slight fading after that, but it didn’t completely disappear immediately, which I appreciated.
Another thing I noticed was how my skin reacted afterward. Some numbing creams I’ve used in the past caused redness or a burning sensation once they wore off.
With Zensa, I only experienced mild sensitivity, nothing alarming or uncomfortable. That alone made it feel more “skin-friendly” compared to others I had tried.
From a usability perspective, I also liked that it didn’t leave a greasy film. My skin felt normal rather than coated in something heavy. This made it easier for the tattoo artist to work without constantly wiping excess product.
Overall, my first experience felt controlled, predictable, and much more comfortable than I expected. went in expecting partial relief, but I came out realizing it actually made a big difference in how I handled the entire session.
What Is Zensa Numbing Cream?
Zensa numbing cream is a topical anesthetic designed to temporarily reduce pain and discomfort on the skin. It is commonly used for tattoos, laser hair removal, microneedling, waxing, and minor cosmetic procedures. The formula typically contains lidocaine, which is the active ingredient responsible for blocking nerve signals in the applied area.
What makes Zensa stand out in the crowded numbing cream market is its balance between strength and skin compatibility. It is designed to be strong enough for professional procedures but still gentle enough for sensitive skin types.
Unlike some harsh anesthetic creams, it aims to avoid excessive irritation or long-lasting redness, which is a big reason why many professionals recommend it.
How Zensa Numbing Cream Works On The Skin?
When you apply Zensa, the lidocaine in the formula begins to penetrate the top layers of the skin. It temporarily blocks sodium channels in nerve endings, which prevents pain signals from being sent to the brain.
In simpler terms, your skin still feels touch and pressure, but the sharp pain signals are significantly reduced.
The effectiveness depends on three main factors:
First is the thickness of application. A proper layer ensures deeper penetration.
Second is waiting time. In my experience, 30–45 minutes is the ideal window before starting a procedure.
Third is skin type. Some people naturally absorb topical anesthetics faster than others, which can slightly affect duration.
Pros Of Zensa Numbing Cream
- Fast and reliable numbing effect
One of the biggest strengths I personally noticed with Zensa is how quickly it starts working.
Based on my experience and what many users report, the numbness begins within about 20–30 minutes when applied correctly.
That’s relatively fast compared to many other creams that take longer to activate.
Once it kicks in, the area feels noticeably desensitized, making procedures like tattoos or laser sessions much easier to tolerate.
What I like here is the predictability. You’re not guessing whether it will work in time—you can actually plan your session around it with some confidence.
- Strong enough for professional procedures
Zensa contains a high concentration of lidocaine (5%), which is one of the strongest topical anesthetics available without a prescription in many regions.
This makes it suitable for tattoos, microneedling, waxing, and even cosmetic injections.
In my case, it handled a tattoo session quite well for the first couple of hours, which is usually the hardest part.
Many professionals also trust it for clients because it performs consistently under real procedure conditions rather than just casual use.
- Long-lasting comfort during procedures
Another major advantage is the duration. On average, the numbing effect lasts around 1.5 to 3 hours depending on skin type, area, and application method.
From my experience, the strongest relief lasted close to 2 hours before slowly tapering off. That window is usually enough for most medium tattoo sessions or cosmetic treatments.
Some users even report that it helps them get through entire laser hair removal appointments without significant discomfort.
- Skin-friendly formula with less irritation
What stood out to me after the session was how my skin felt afterward. Some numbing creams leave a burning or irritated feeling once they wear off, but Zensa felt relatively gentle.
This is likely due to its added soothing ingredients like Vitamin E, which help reduce redness and support skin recovery. I didn’t experience any harsh reactions, just mild sensitivity that faded quickly.
- Smooth texture and easy application
Zensa has a lightweight, smooth texture that spreads evenly without clumping. This might sound minor, but it actually matters a lot during preparation. Uneven application can lead to patchy numbness, which ruins the effect.
I found it easy to apply a consistent layer, and it didn’t leave a greasy residue. That made it easier for my tattoo artist to work without constantly wiping the area.
- Trusted by professionals
Another strong point is its reputation in the beauty and tattoo industry. Many artists and practitioners prefer it because it offers a balance between strength and skin safety.
It’s not just a casual over-the-counter cream; it’s something that’s regularly used in professional environments, which adds confidence in its reliability.
Cons Of Zensa Numbing Cream
- Slightly expensive compared to alternatives
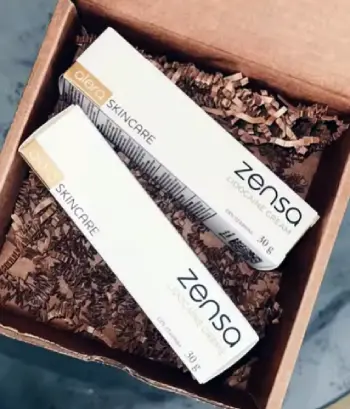
One of the first things I noticed is the price. Zensa is not the cheapest option on the market.
When compared to generic lidocaine creams, it definitely sits in a higher price range.
From a practical perspective, this might not matter if you only use it occasionally. But if you’re someone getting multiple procedures done, the cost can add up quickly.
So while the quality is strong, the price may feel a bit heavy for some users.
- Not completely pain-free
Even though Zensa significantly reduces pain, it does not eliminate it entirely. I still felt pressure and some discomfort during deeper or more intense parts of my tattoo session.
This is important to understand because some people expect full numbness.
In reality, it mainly dulls sharp pain rather than removing all sensation. So you still know something is happening—you just don’t feel the full intensity.
- Requires proper application to work well
Zensa is not a “quick rub and go” product. It needs correct application to work effectively. If you apply too thin a layer or don’t wait long enough, the results can be disappointing.
From my experience, the ideal process includes applying a thick layer and waiting at least 30–45 minutes.
Many people also use plastic wrap to improve absorption. Without these steps, the performance drops noticeably.
So in a way, it demands discipline. If you rush it, you won’t get the full benefit.
- Duration may vary depending on skin and area
Another limitation is that the duration is not identical for everyone. Some people experience long-lasting numbness, while others feel it fade sooner.
Areas with thicker skin or higher blood flow may reduce effectiveness. I noticed this myself—some parts stayed numb longer than others. That inconsistency can be slightly frustrating if you expect uniform results across a large area.
- Not ideal for extremely large or long sessions alone
While Zensa works well for medium-length procedures, it may not fully cover very long tattoo sessions without reapplication or breaks.
Some users report that the effect starts fading after a couple of hours, which means artists sometimes need to work in sections. If your procedure is extremely long, you may need additional strategies beyond just relying on one application.
Tips For Zensa Numbing Cream
- Clean the skin thoroughly before applying
One of the most overlooked steps is proper skin preparation. Before applying Zensa, I always make sure the area is completely clean and dry.
Any oil, sweat, lotion, or dirt can act like a barrier and reduce absorption.
In my experience, even a slightly oily surface can make the numbing effect weaker or uneven.
I usually wash the area with mild soap, rinse well, and let it air dry fully before applying the cream. This simple step alone improves performance significantly.
- Apply a thick, even layer
A common mistake people make is applying Zensa too thinly. I used to think a light layer would be enough, but that often leads to patchy numbing.
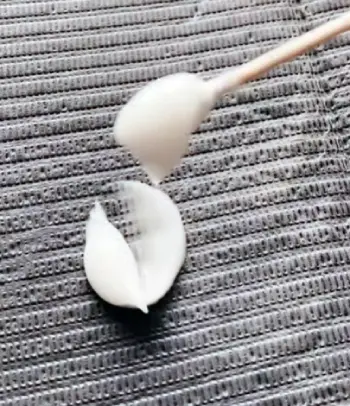
The cream needs to sit on the skin in a generous layer so it can properly penetrate. I usually apply it like frosting on a cake—not rubbing it in aggressively, but spreading it evenly so no skin is visible underneath.
If the layer is too thin, the effect becomes inconsistent, and you may still feel sharp pain in certain areas.
- Cover the area for better absorption
If you really want to maximize results, covering the area with plastic wrap after applying Zensa makes a big difference. This helps trap heat and moisture, which improves absorption into the skin.
From my experience, this step noticeably increases both the intensity and duration of numbness. Without covering, the cream can dry too quickly, reducing its effectiveness before it fully activates.
It also prevents the cream from rubbing off onto clothes or surfaces while you wait.
- Wait long enough before starting the procedure
Timing is everything. I’ve tested different waiting periods, and I can confidently say that patience matters here.
Zensa typically starts working within 20–30 minutes, but the full effect usually takes closer to 40–45 minutes. For deeper or more painful procedures, I personally wait around 50 minutes to be safe.
Starting too early is one of the biggest reasons people think numbing creams “don’t work.” In reality, they just didn’t give it enough time.
- Avoid touching or disturbing the area
Once the cream is applied, it’s important not to keep touching or checking it. I know it’s tempting to test whether it’s working, but constant touching can reduce absorption and spread the product unevenly.
I usually apply it, cover it, and leave it completely alone until the waiting time is over. This helps maintain a consistent layer and ensures the numbing develops evenly across the area.
- Use the right amount for the right area
Another important tip is adjusting quantity based on the size of the treatment area. Small areas don’t need excessive product, while larger areas require more careful coverage.
If you spread too little over a large surface, you’ll end up with weak spots. On the other hand, using a proper amount ensures full coverage and more reliable numbness across the entire area.
It’s more about balance than overuse.
Comparison Of Zensa With Other Numbing Cream Brands
- Zensa vs Emla Cream
Emla Cream is one of the most well-known medical-grade numbing creams. In my experience, Emla works very effectively for clinical procedures, especially injections or small dermatology treatments.
However, it tends to feel slightly heavier on the skin and takes a bit longer to reach full effect.
Zensa, on the other hand, felt faster in activation and more comfortable for longer sessions like tattoos. Where Emla feels more “medical,” Zensa feels more practical for aesthetic procedures.
- Zensa vs Dr. Numb Cream
Dr. Numb Cream is widely used for tattooing and cosmetic work. It provides decent numbing, but I found its duration slightly inconsistent depending on the area of application.
Compared to it, Zensa gave me a more stable experience. The numbness didn’t spike and drop randomly, which made the session easier to manage. Dr. Numb is still effective, but Zensa felt more balanced in performance.
- Zensa vs TKTX Cream
TKTX Numbing Cream is often known for its strong numbing effect, especially in tattoo communities. In some cases, it can feel more intense initially compared to Zensa.
However, I noticed TKTX can sometimes lead to uneven skin reactions depending on formulation versions. Zensa felt more consistent and less unpredictable, even if TKTX might feel slightly stronger at peak effect.
- Zensa vs Lidocaine Generic Creams
Generic lidocaine creams vary widely in quality. Some are affordable but inconsistent in absorption and duration. When I compare them directly, Zensa feels more refined in texture and performance.
With generics, I often had to reapply or deal with uneven numbness. Zensa reduced that uncertainty significantly.
Also Read: Is Champagne Body Cream Worth It?
Frequently Asked Question (FAQ)
Yes, it is effective for tattoos and cosmetic procedures.
Some strong options include TKTX and medical lidocaine-based creams.
Usually around 30 to 45 minutes.
Yes, it reduces pain and improves comfort during procedures.
Wrapping Up
After using Zensa numbing cream multiple times, I can confidently say it delivers reliable, consistent pain reduction for cosmetic and tattoo-related procedures.
It won’t eliminate all sensation, but it significantly reduces sharp discomfort and makes longer sessions more manageable.
If you want a balanced, skin-friendly numbing option that performs steadily, this is one I would personally consider keeping in my routine.
Recent Posts
● Interactive 5-Zone Interior & Exterior Paint Blueprint Paint Coverage Calculator: Gallons, Primer, Square Footage & Cost Tap any architectural surface zone on the blueprint...
If you want smooth, shiny hair without spending a fortune on a premium styling tool, the Ella Bella hair dryer may be worth considering.In these Ella Bella hair dryer reviews, I’ll look...