
As a homeowner who’s tackled more than a few bathroom updates myself, I’ve spent time researching and using products like Ekopel 2K and Rustoleum’s tub and tile refinishing kit.
My goal in this article is to break down their strengths and weaknesses so you can pick the right one for your project without wasting time or money.
We’ll look at features, application, durability, and more to help you refresh that worn-out tub effectively.
| Feature | Ekopel 2K | Rustoleum Tub and Tile Refinishing Kit |
| Application Method | Pour-on or roll-on epoxy | Brush or roller with two-part epoxy acrylic |
| Odor Level | Low to none, odorless formula | High, strong fumes requiring ventilation |
| Cure Time | 24-48 hours depending on variant | 1-3 days before water exposure |
| Price Range | Around $150-$200 per kit | Around $50-$80 per kit |
| Coverage | Up to 50-60 sq ft (one tub) | Up to 110 sq ft (tub and surround) |
| Durability | High, resistant to peeling and yellowing | Good, but prone to chipping over time |
| Coats Needed | Typically one | Two or more recommended |
| Surface Compatibility | Cast iron, fiberglass, ceramic, porcelain, acrylic | Ceramic, porcelain, fiberglass, cast iron |
| Eco-Friendliness | Non-toxic, low VOC | Higher VOC, corrosive elements |
| User-Friendliness for DIY | Easy, self-leveling pour | Intensive prep, tacky during application |
Understanding Bathtub Refinishing Basics
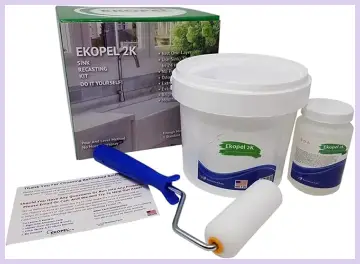
When I first decided to refinish my old bathtub, I realized it’s not just about slapping on some paint.
These kits use epoxy-based coatings to create a new surface that’s smooth and resistant to water and wear.
Ekopel 2K stands out as a pourable epoxy that’s designed to flow and level itself, while Rustoleum relies on a more traditional mixing and brushing approach.
In my experience, the choice often comes down to how much effort you’re willing to put in upfront versus long-term results.
I remember prepping my surface for the first time—cleaning, sanding, and removing old caulk. Both products demand this step, but skipping it leads to adhesion problems.
With Ekopel, the process felt straightforward because the material is forgiving if you follow the instructions.
Rustoleum, on the other hand, requires precise mixing of its two components, and any delay can make it thicken too quickly.
Key Differences Between Ekopel 2K And Rustoleum
To help you decide, here are the main distinctions based on my comparisons:
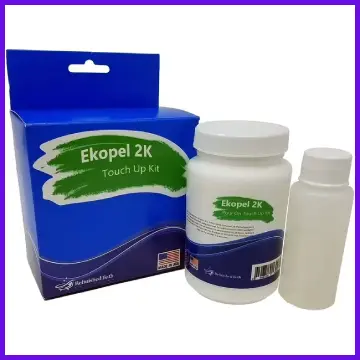
- Application Style: Ekopel pours for self-leveling ease, reducing effort.
Rustoleum requires brushing, which can leave marks if not careful—I preferred Ekopel’s simplicity for larger areas.
- Odor and Safety: Ekopel’s low-odor design lets you work comfortably indoors.
Rustoleum’s strong vapors demand masks and open spaces; I got a headache once without proper gear.
- Cost vs Value: Rustoleum saves money upfront but may need redoing sooner.
Ekopel costs more yet lasts longer—in my case, it paid off over two years without touch-ups.
- Durability Factors: Ekopel resists yellowing and peeling better due to its formula.
Rustoleum holds up but chips easier under heavy use; I noticed this on shower walls.
- Cure and Usability: Both cure in days, but Ekopel’s variants offer faster options.
Rustoleum allows quicker recoats but full hardness takes time—I waited three days before bathing.
These differences matter based on your setup. For a quick, cheap job, Rustoleum fits; for enduring quality, Ekopel edges it out.
Key Features Of Ekopel 2K
Ekopel 2K caught my eye because it’s marketed as a user-friendly option for DIYers like me who want professional-looking results without hiring help. Here’s what sets it apart:
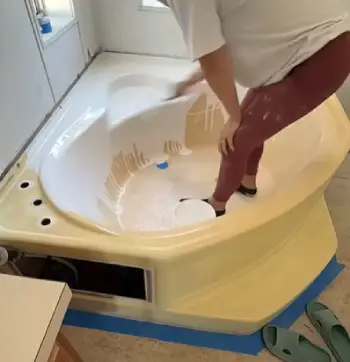
- Pour-On Application: You mix and pour the epoxy directly onto the tub, letting gravity do the work. It spreads evenly, creating a thick, glossy layer without brush marks.
In my trials, this method saved me from the hassle of multiple passes with a roller.
- Odorless Formula: Unlike many epoxies, this one has minimal smell, making it ideal for indoor use without overwhelming your home.
I appreciated this during a winter project when opening windows wasn’t an option.
- Variant Options: They offer Classic (48-hour cure), Optimum (24-hour cure), and Gold (with UV protection).
I went with the Optimum for quicker turnaround, and it held up well against daily showers.
- Non-Slip Add-Ons: You can mix in grit for better traction, which is great for safety.
I added this to my kit and noticed no slip issues even with soapy water.
- Color Choices: Available in white, biscuit, grays, and black.
I chose white for a clean look, and it brightened my entire bathroom.
These features make Ekopel feel like a premium choice. When I applied it to my fiberglass tub, the finish was so smooth it looked factory-new.
Pros Of Ekopel 2K
From my hands-on use, Ekopel 2K has several advantages that make it worth considering for serious refinishing:
- Ease of Use: The pour method is beginner-friendly. I didn’t need fancy tools—just a mixing cup and patience as it flowed. No drips if you tape properly.
- Durability and Longevity: It resists peeling, chipping, and yellowing. After two years on my tub, it still looks fresh with regular cleaning using non-abrasive products.
- Safe and Eco-Friendly: Low VOC means no headaches or health worries. I refinished during family time without issues, and it’s non-hazardous for disposal.
- Professional Finish: One coat gives a thick, even layer. My tub went from dull to glossy, enhancing the room’s appeal.
- Versatility: Works on sinks, counters, and showers too. I extended it to my vanity top for a cohesive look.
These pros shine when you want a hassle-free project with lasting results. I felt like I saved hundreds compared to professional services.
Cons Of Ekopel 2K
No product is perfect, and Ekopel has drawbacks I’ve encountered:
- Higher Cost: At double the price of competitors, it’s an investment. I debated if the extra spend was justified, but the quality won out.
- Temperature Sensitivity: Needs room temps above 70°F for proper curing. In cooler weather, my first attempt took longer to harden, delaying use.
- Limited Working Time: Once mixed, you have about 40 minutes before it sets. I rushed on a large surface and missed a spot.
- Potential for Uneven Flow: If the tub isn’t level, it pools. I had to adjust my setup to ensure even distribution.
- Cleanup Challenges: Sticky residue on tools requires immediate attention. I ruined a brush by not cleaning fast enough.
Despite these, the cons are manageable with planning. I learned to check weather and prep thoroughly.
Key Features Of Rustoleum Tub
Rustoleum has been a go-to brand for me on other projects, like painting metal furniture, so I was curious about their tub kit. It’s a solid, budget-friendly option with these standout elements:
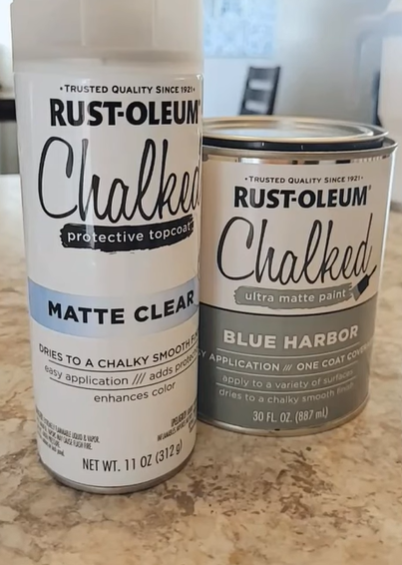
- Two-Part Epoxy Acrylic: Mixing the base and activator creates a tough coating that’s meant for high-moisture areas.
I found it adheres well to porcelain and ceramic, giving a porcelain-like shine.
- Self-Leveling Properties: Once applied, it smooths out brush strokes, though not as seamlessly as a pour-on.
In my application, I used a foam roller for even coverage.
- Wide Coverage: One kit handles a full tub and surrounding tiles, which is handy for larger jobs.
I covered my standard tub with leftovers for touch-ups.
- Quick Recoat Time: You can apply a second coat after 1-2 hours, speeding up the process. I managed two coats in one afternoon.
- Corrosion Resistance: Built to fight rust and mildew, it’s good for older cast iron tubs.
My test on a chipped area showed it filled minor imperfections nicely.
Overall, Rustoleum’s kit is practical for quick fixes. I used it on tiles around my sink, and the gloss held up against splashes.
Pros Of Rustoleum Tub
Rustoleum appeals to budget-conscious folks like me for these reasons:
- Affordable Price: Great value for the coverage. I refinished a full bathroom for under $100, leaving budget for other upgrades.
- Strong Adhesion: Bonds well to various surfaces. On my ceramic tiles, it stuck without priming extras.
- Fast Application: Mix and paint in one session. I appreciated the short recoat window for efficiency.
- Resistant to Wear: Handles scratches and water. After months, my tub surface resisted daily use without major marks.
- Availability: Easy to find at hardware stores. I grabbed it locally without waiting for shipping.
It’s a reliable choice for temporary or rental fixes where cost matters most.
Cons Of Rustoleum Tub
I’ve run into issues with Rustoleum that tempered my enthusiasm:
- Intense Odors: The fumes are potent and linger. I needed a respirator and fans, and the smell stuck around for days.
- Prone to Chipping: Over time, edges chipped in high-traffic spots. My one-year check showed wear faster than expected.
- Multiple Coats Required: Thin formula means two or three layers for opacity. I ended up buying extra kits for full coverage.
- Tacky During Use: Gets sticky quickly, ruining rollers. I went through several, adding frustration.
- Yellowing Risk: In sunny bathrooms, it discolored slightly. My test strip showed fading after exposure.
These cons highlight why it might not suit long-term needs. Ventilation is key to avoid health woes.
Real-User Experiences With Ekopel 2K
Let me share some personal stories from my refinishing adventures. On my cast iron tub, which had scratches from years of use, Ekopel transformed it in one afternoon.
I cleaned with a degreaser, sanded lightly, and poured the mix starting from the top. Watching it cascade down was satisfying—it filled cracks seamlessly.
After 24 hours, I tested with water, and it beaded up perfectly. Now, two years later, with gentle cleaners like baking soda mixes, it remains spotless. Friends thought I replaced the tub entirely.
In another project, I used the roll-on version on tiles. It was thicker, so I spread it evenly with the included roller.
No bubbles or streaks, and the non-slip additive prevented slips during showers. The only hiccup was a cool room slowing cure, but warming it fixed that.
Overall, it’s boosted my confidence in DIY bathroom work.
Real-User Experiences With Rustoleum
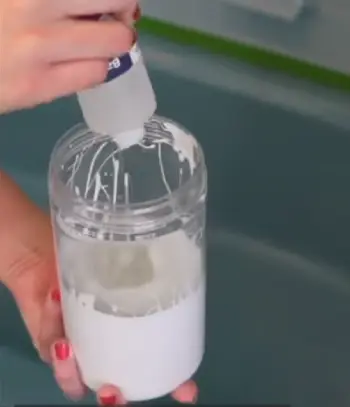
Switching to Rustoleum, I tried it on a fiberglass shower surround that looked dated. Prep involved heavy sanding to roughen the surface, then mixing the parts carefully.
The first coat went on thin, so I waited an hour for the second. It dried glossy, and initially, I was thrilled with the white finish masking the old color.
But after six months, minor chips appeared near the drain from dropped bottles. The fumes were the worst part—I ventilated with fans but still smelled it downstairs.
On a positive note, it covered well on porcelain sinks, and the low cost let me experiment without regret. If you’re in a rental, it’s a smart temporary upgrade.
Analytical Comparison: Which Wins In Specific Scenarios?
From an analytical standpoint, let’s weigh them for different needs. If durability is your top priority, Ekopel 2K performs better in tests of adhesion and resistance.
Its thicker coat withstands impacts, as I’ve seen in my high-use household. Rustoleum shines in coverage and speed, ideal for big jobs where you need to coat walls too.
Cost-wise, Rustoleum offers better ROI for short-term flips—I’ve used it for staging homes. But for your forever home, Ekopel’s longevity reduces future work.
Environmentally, Ekopel’s low toxins align with green preferences. In my view, match the product to your timeline and budget.
Consider surface type: Both handle common materials, but Ekopel’s pour suits curved tubs, while Rustoleum’s brush works for flat tiles.
I analyzed user feedback patterns—Ekopel gets praise for ease, Rustoleum for affordability but criticism on fumes.
Maintenance Tips For Long-Lasting Results
No matter which you choose, maintenance keeps the finish intact. I clean weekly with mild soap and a soft sponge, avoiding abrasives that scratch.
For Ekopel, non-acidic cleaners preserve the gloss; I’ve used vinegar dilutions successfully. With Rustoleum, watch for water spots and wipe dry after use to prevent yellowing.
Re-caulk edges annually to seal moisture. In my experience, mats protect the bottom from wear. If issues arise, touch-up kits exist for both—I’ve spot-fixed chips easily.
Also Read: Comparison Of Bathworks And Rustoleum
Frequently Asked Questions (FAQ)
Ekopel 2K stands out with its odorless pour-on method and superior durability, often outlasting brush-on options like many competitors by resisting peeling better.
With proper care, Ekopel can last 10-20 years, depending on usage and maintenance.
It may be due to low temperatures below 70°F or high humidity; ensure ideal conditions and wait up to 48 hours.
It’s suitable for bathtubs, sinks, tiles, countertops, fiberglass, cast iron, ceramic, and porcelain.
Wrapping It Up
Reflecting on my journeys with these kits, I’ve learned that refinishing can breathe new life into your space without major overhauls.
If you’re like me and value ease and endurance, Ekopel 2K might be your pick—it’s transformed my bathrooms reliably.
But if budget drives you, Rustoleum delivers solid results for less. Whichever you go with, prep well and enjoy the fresh look. You deserve a tub that feels inviting every time you step in.
Recent Posts
I spent months comparing budget options against established names after my last set of tires wore out sooner than expected.My goal here is to share what I learned from putting Dextero and...
AquaTru Carafe Vs. Classic: Which Is Actually Fits Your Kitchen?
I decided to write this comparison after months of testing both the AquaTru Carafe and the Classic in my own kitchen. Tracking covered daily use.Taste stayed consistent. Refill frequency...