I have spent countless hours testing combination machines to figure out which one is better between the Brother SE725 and SE700, and my goal today is to share those insights with you. If you are stuck deciding between these two popular embroidery and sewing models, you are definitely not alone.
I understand how overwhelming the specifications can be when you just want to create beautiful projects. In this detailed review, I will break down my personal testing notes, practical functionality, and overall value to help you make an informed choice for your craft room.
A Brief Comparison Table
| Feature | Brother SE725 | Brother SE700 |
| Built-In Sewing Stitches | 103 | 103 |
| Built-In Embroidery Designs | 135 plus 50 extra app designs | 135 base designs |
| Wireless LAN Capability | Yes, for Artspira app transfers | Yes, for Artspira app transfers |
| Embroidery Field Size | 4 by 4 inches | 4 by 4 inches |
| Display Screen | 3.2 inch color LCD touchscreen | 3.2 inch color LCD touchscreen |
| Exclusive Bundle Status | Often a retailer exclusive edition | Standard base retail edition |
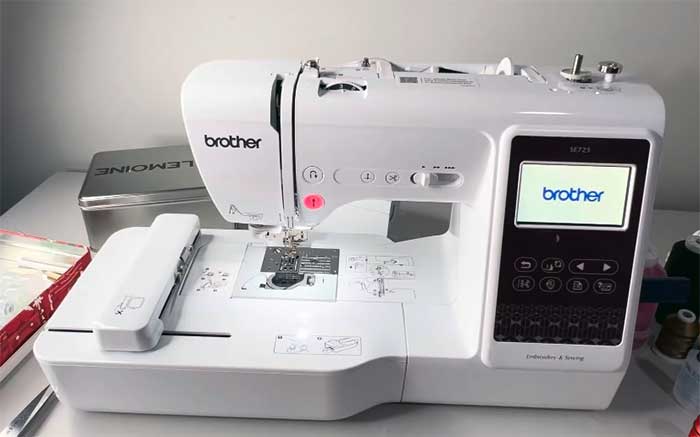
My Experience With Brother SE725
When I first unboxed this unit, I was immediately struck by how well it blended professional capabilities with user-friendly accessibility. Operating this machine feels like having a knowledgeable assistant guiding your stitches, especially when working on complex personalized garments.
I spent weeks pushing its limits on thick fabrics and intricate thread designs, and it consistently delivered beautiful results without frustrating me. The wireless features genuinely transformed how I manage my digital files, making my entire creative process feel incredibly smooth.
Pros Of Brother SE725
- Generous Built-In Design Library For Customization: I absolutely love the fact that this machine includes a massive selection of pre-loaded designs and fonts, allowing me to start creating customized garments immediately without needing external software, which saves me both time and money right out of the box while keeping my creative inspiration flowing perfectly every single day.
- Seamless Wireless Connectivity Through Artspira App: Transferring my digital files directly from my smartphone or computer to the machine feels incredibly smooth and futuristic, completely eliminating the frustration of hunting for compatible USB flash drives and allowing me to easily access an expansive database of cloud patterns whenever I want to stitch something totally unique.
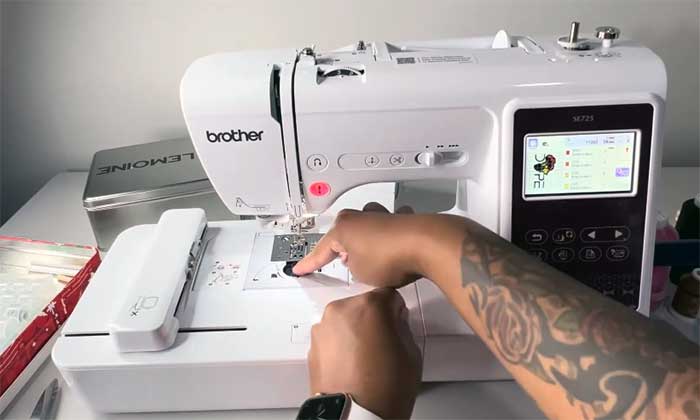
- Vibrant Touchscreen Display For Easy Editing: The brilliantly lit color display lets me manipulate my layouts with just my fingertips, making resizing, rotating, and mirroring patterns incredibly intuitive and straightforward, meaning I spend significantly less time deciphering complex menus and a lot more time enjoying the actual process of bringing my fabric creations to life.
- Smooth Automatic Needle Threading System Functionality: Threading the needle used to be my least favorite chore until I tried this automated mechanism, which reliably pushes the thread right through the eye with a simple lever press, saving my eyesight from unnecessary strain and ensuring I can start my decorative stitching sessions without any initial annoyance.
- Compact Footprint Perfect For Small Spaces: Despite offering professional-level functionality, this unit occupies surprisingly little space on my crafting desk, making it an ideal choice for apartment dwellers or anyone with a dedicated but cozy sewing corner who refuses to sacrifice advanced performance for a smaller physical profile in their everyday comfortable work environment.
- Exceptional Value With Exclusive Downloadable Content: Getting access to additional premium patterns simply by registering the product feels like a fantastic bonus that enhances the overall investment, giving me a much wider variety of modern aesthetics to choose from without forcing me to purchase expensive individual design files from third-party digitizers located on the internet.
- Reliable Stitch Quality Across Various Fabrics: Whether I am working with lightweight cotton or sturdy denim, the feed dog system handles the material beautifully and consistently produces perfectly balanced tension, resulting in professional-looking seams and tight embroidery fill that never puckers or pulls, giving me immense confidence in my finished wearable pieces every single time.
Read more: Comparison Of Epson 8500 And 8550
Cons Of Brother SE725
- Restricted Maximum Embroidery Area Size Limitations: The four-by-four inch hoop feels quite restrictive when I want to tackle larger jacket back pieces or expansive quilt blocks, forcing me to either split my digital files into multiple tedious sections or simply avoid those ambitious projects altogether, which definitely hinders my overall creative flexibility over an extended period.
- Slower Operating Speed During Complex Designs: While adequate for casual hobbyists, the maximum stitching speed is noticeably sluggish compared to higher-end industrial models, meaning I have to sit and wait considerably longer for dense, color-heavy patterns to complete, testing my patience when I am trying to finish multiple personalized gifts on a very tight holiday deadline.
- Occasional Thread Nesting Under The Bobbin: I occasionally experience frustrating thread jams in the lower compartment if the upper tension is not calibrated perfectly, requiring me to carefully cut away the tangled mess and completely rethread the entire pathway, which completely breaks my workflow and sometimes slightly damages the delicate backing material of my garment.
- Limited Included Hoops Require Extra Purchases: I was slightly disappointed to discover that only the standard medium frame comes in the box, meaning I had to immediately spend extra money on smaller hoops for socks and larger multi-position frames to truly maximize the utility of the machine for my highly varied everyday apparel crafting requirements.
- Software Dependency For Advanced Pattern Editing: Even though the onboard interface is decent, I quickly realized that achieving truly custom digitizing requires purchasing and learning separate desktop software, as the built-in screen only allows basic manipulations, which adds a hidden cost and complexity for anyone wanting to turn their own original drawings into accurate digital stitches.
- Noticeable Operating Noise In Quiet Environments: The internal motor generates a distinct mechanical humming and clicking that can be quite distracting when I try to work late at night while my family is sleeping, forcing me to either relocate my setup to a more isolated room or entirely limit my heavy production hours to the daytime.
- Retailer Exclusivity Makes Finding Parts Difficult: Because this specific variation is often tied to certain big-box stores, finding exact replacement accessories or accessing localized repair services can sometimes be slightly more annoying than with the standard base model, requiring me to navigate specific warranty channels instead of just visiting my neighborhood sewing machine repair shop.
Maintenance Tips For Brother SE725
- Regularly Cleaning The Bobbin Case Area: I always make sure to remove the needle plate and gently brush out the accumulated lint from the drop-in bobbin compartment after every major project, preventing nasty thread jams and ensuring the rotational hook mechanism glides flawlessly without any abrasive friction damaging the internal plastic components over time.
- Changing Needles After Every Large Project: Swapping out dull needles for fresh ones is my most crucial habit, as a bent or blunt tip will absolutely ruin an expensive garment by skipping stitches or punching ragged holes, so I strictly enforce a new needle policy after approximately eight solid hours of highly dense automated embroidery work.
- Using High Quality Specially Formulated Thread: I learned the hard way that cheap polyester spools shed excessive fibers and break constantly under high tension, so I now exclusively purchase premium, smooth-running thread brands recommended by the manufacturer, which drastically reduces internal dust buildup and keeps my tension disks operating perfectly at optimal daily performance levels.
- Keeping The Machine Covered When Idle: Protecting my investment from household dust and pet dander is surprisingly vital, so I always drape a thick fabric cover over the unit the moment I finish my daily session, stopping microscopic debris from settling into the touchscreen edges or falling down into the delicate upper metal tension channels.
- Scheduling Annual Professional Servicing And Oiling: Even though I perform weekly basic cleaning, I firmly believe in taking the unit to a certified technician once a year for deep internal lubrication and timing adjustments, guaranteeing the computerized motherboard and heavy mechanical shafts remain perfectly synchronized for many decades of reliable, heavy-duty everyday garment creation.
- Updating Firmware Via The Wireless Network: I routinely check the mobile app for available system updates and beam them directly to the machine, ensuring the internal software always operates smoothly without random freezing glitches, while also occasionally unlocking newly optimized stitch paths or slightly better screen responsiveness provided directly by the engineering team at headquarters.
- Properly Storing Hoops To Prevent Warping: I never leave my fabric stretched tightly in the plastic frames overnight because doing so can permanently warp the inner rings, so I always loosen the adjustment screws and store the hoops perfectly flat in a drawer to maintain their crucial grip strength for future precision apparel alignment tasks.
Comparison With Other Brands Brother SE725
- Superior User Interface Against Singer Models: When I put this machine next to comparable Singer hybrid units, the vibrant touchscreen and highly intuitive icon layouts feel vastly superior and much more modern, eliminating the frustrating guesswork and reliance on physical manuals that I often experience when navigating older, clunkier button-driven interfaces from competing household brands.
- More Affordable Than Entry Level Berninas: I appreciate how this unit delivers surprisingly robust computerized features at a fraction of the cost of a basic Bernina, allowing budget-conscious crafters like me to enjoy automated threading, jump stitch trimming, and flawless tension without having to empty my savings account just to afford the prestigious Swiss brand name.
- Better App Ecosystem Compared To Janome: The proprietary mobile application ecosystem provides a much more seamless and genuinely useful digital design transfer experience than the somewhat dated software solutions offered by Janome, making my entire workflow feel connected, fast, and remarkably in tune with how I manage everyday files on my personal smartphone right now.
- Lighter Physical Weight Than Husqvarna Viking: Moving this machine off my dining table is practically effortless because the plastic chassis is remarkably lightweight compared to the incredibly heavy metal internal frames used by Husqvarna Viking, giving me true portability for weekend sewing retreats without sacrificing too much stability during fast, intense daily fabric embroidery sessions.
- Wider Accessory Availability Over Juki Hybrids: Finding specialized presser feet or aftermarket magnetic hoops is incredibly easy and inexpensive due to the massive global market share, whereas tracking down compatible parts for my friend’s Juki combo machine usually involves expensive overseas shipping and frustrating compatibility checking on obscure specialty retailer websites hidden across the internet.
- Easier Adaptation Than Pfaff Machines: I found the built-in animated tutorials and straightforward tension dials much more forgiving for absolute beginners than the highly technical, albeit precise, integrated dual-feed systems found on premium Pfaff models, making this specific unit the absolute best starting point for anyone entirely new to the world of automated fabric arts.
- Stronger Community Support Versus EverSewn Models: Whenever I encounter a weird error code or need fresh inspiration, the sheer volume of online forums, video tutorials, and dedicated social media groups for this specific ecosystem completely dwarfs the limited resources available for niche brands like EverSewn, guaranteeing I can always find a quick, reliable solution immediately.
My Experience With Brother SE700
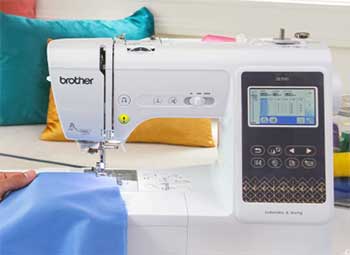
Switching over to this base model felt incredibly familiar, yet distinctly streamlined.
I put this machine through its paces by sewing several garments from scratch and then adding personalized monograms to them.
It performs its core duties with remarkable consistency and quiet efficiency.
I found myself relying on its bright lighting and simple interface daily.
While it lacks some of the bonus digital extras of its sibling, the mechanical reliability and ease of use made it an absolute joy to test in my studio.
Pros Of Brother SE700
- Incredible Versatility For Everyday Sewing Tasks: I truly value how effortlessly this model transitions from repairing a torn pair of jeans to embroidering a complex floral motif on a canvas tote bag, effectively replacing two separate bulky machines and freeing up a massive amount of valuable tabletop space in my relatively cramped and messy crafting studio.
- Dependable Wireless File Transfer Capabilities Included: Just like its slightly upgraded sibling, the built-in Wi-Fi functionality completely revolutionizes my workflow by letting me ping designs straight from my laptop to the LCD screen in seconds, entirely bypassing the highly annoying process of formatting tiny USB sticks that I always seem to mysteriously lose around the house.
- Fantastic Stitch Quality For Garment Construction: When utilizing the standard utility stitches, I consistently achieve gorgeous, perfectly locked seams that hold up beautifully in the wash, proving that the underlying mechanical components are robust enough to handle serious apparel making alongside the flashy, automated decorative features that initially drew me to this wonderful crafting product.
- Brightly Illuminated LED Workspace For Accuracy: The brilliant, daylight-balanced LED lights positioned perfectly above the needle completely eliminate frustrating shadows on my fabric, allowing me to easily thread dark colors and monitor intricate details during gloomy afternoons without needing to drag an extra, glaringly bright desk lamp over to my main everyday sewing work area.
- Readily Available Base Model Replacement Parts: Because this is the standard, universally stocked version rather than a retailer exclusive, I have absolutely zero trouble walking into any generic craft store and immediately purchasing perfectly compatible bobbins, replacement needles, or extension tables, making my long-term machine ownership experience incredibly convenient, fast, and completely stress-free overall.
- User Friendly Built In Troubleshooting Guides: Whenever I accidentally thread the machine incorrectly or experience a sudden tension issue, the onboard display immediately offers helpful, step-by-step visual diagrams to fix the exact problem, essentially providing me with an interactive instruction manual that prevents minor mistakes from ruining my entire creative afternoon and keeping me focused.
- Smooth Drop In Bobbin System Design: Loading the lower thread is practically foolproof thanks to the clear plastic cover and printed directional arrows, allowing me to easily monitor my remaining thread levels at a glance and drop in a fresh spool in under ten seconds without removing my fabric from the workspace during important operations.
Cons Of Brother SE700
- Lack Of Extra Bonus Downloadable Designs: Unlike the exclusive bundle version, this standard base model does not come with the promotional access to those additional fifty premium cloud patterns, meaning I am stuck with the standard onboard library unless I want to immediately start purchasing individual digital files from various third party digitizing creators online.
- Noticeable Vibration At Maximum Operating Speed: When I push the motor to its absolute limit during long, straight sewing runs, the entire chassis tends to vibrate noticeably on my desk, requiring me to place a thick rubber mat underneath the base to dampen the annoying rattling noise and keep the unit perfectly stable during heavy usage.
- Screen Size Can Feel Slightly Cramped: While the color interface is certainly functional and bright, the relatively small three-inch display can make selecting tiny, detailed design elements or typing out long customized names a bit frustrating for my fingers, frequently causing me to accidentally tap the wrong icon during complex, detailed layout editing sessions.
- Automatic Threader Occasionally Misses The Eye: Although generally reliable, the mechanical threading hook sometimes fails to grab specialty metallic or thicker topstitching threads on the first try, forcing me to manually guide the fussy fibers through the tiny needle hole anyway, which slightly defeats the purpose of having an automated convenience feature installed on the machine.
- Four By Four Hoop Limits Creativity: I constantly find myself frustrated by the strict square size limitation of the included frame, as modern apparel designs often require much wider sweeping elements that simply cannot fit without utilizing highly advanced, incredibly tedious software splitting techniques that I absolutely hate doing on my personal computer at home.
- Flimsy Feeling Plastic Accessory Storage Box: The removable front compartment that houses all the presser feet and maintenance tools feels surprisingly thin and hollow compared to the rest of the machine, occasionally popping off its hinges when I accidentally bump it with my knee while maneuvering bulky winter quilts directly under the main needle area.
- Requires Frequent Tension Adjustments For Embroidery: Transitioning between regular cotton piecing and dense, high-speed automated stitching often necessitates tedious manual tweaking of the upper tension dial to prevent ugly loops from forming on the back of my fabric, adding a layer of technical babysitting that disrupts my otherwise enjoyable creative momentum during my dedicated crafting hours.
Read more: Comparison Of Tactacam Defend And Reveal
Maintenance Tips For Brother SE700
- Brushing Out The Feed Dogs Weekly: I consistently remove the metal throat plate to extract the thick felt-like buildup of cotton dust that inevitably packs tightly between the grooved feed teeth, ensuring my fabric continues to pull through the machine perfectly straight without any annoying diagonal drifting during precision apparel piecing and quilting sessions.
- Using Canned Air Only On The Exterior: I learned never to blast compressed air directly into the delicate bobbin mechanism because it simply drives the abrasive lint deeper into the computerized sensors; instead, I solely rely on tiny, stiff nylon brushes and dedicated miniature vacuum attachments to safely extract dangerous debris from the lower internal chassis.
- Checking Needle Alignment Before Large Projects: Before I hit start on a three-hour automated pattern, I always slowly turn the side handwheel toward me to verify the needle drops perfectly dead center into the presser foot gap, completely avoiding disastrous metal needle strikes that could instantly shatter the throat plate and entirely ruin the entire machine.
- Wiping The LCD Screen With Microfiber: To keep the touch interface highly responsive and easy to read, I strictly use a dry, premium optical microfiber cloth to gently wipe away oily fingerprints and static dust, deliberately avoiding any harsh liquid chemical cleaners that could potentially strip away the sensitive outer digitizer coating over an extended period.
- Storing Thread Spools Away From Sunlight: I realized that keeping my vibrant thread collection exposed on a sunny windowsill causes the delicate fibers to become brittle and dramatically fade over time, so I now store them inside closed plastic organizational bins to ensure they maintain their maximum tensile strength and beautiful original color saturation.
- Emptying The Automatic Thread Cutter Bin: The tiny internal blade that automatically snips my jump stitches naturally generates microscopic thread clippings that eventually build up around the cutting mechanism, so I make sure to manually inspect and clear this specific area monthly to keep the blade slicing sharply, cleanly, and perfectly every single time I sew.
- Replacing The Bobbin Case If Scratched: If my needle ever accidentally strikes the plastic drop-in casing, I immediately order a brand new replacement part, because even a microscopic burr or scratch on the rim will repeatedly snag the delicate upper thread, causing endless, highly frustrating breakages that are otherwise completely impossible to diagnose and fix.
Comparison With Other Brands Brother SE700
- More Intuitive Threading Than Older Singers: The numbered, high-contrast pathways printed directly onto the plastic shell make guiding the thread absolutely foolproof compared to the convoluted, hidden tension disks on traditional Singer models, completely removing the initial frustration for anyone who has never successfully operated an automated fabric crafting tool before in their life.
- Excellent Price To Performance Against Janome: I genuinely feel that this unit offers significantly more built-in alphabets, utility stitches, and advanced editing features for the exact same retail price as a completely basic, entry-level Janome embroidery model, maximizing the sheer creative value I get for my hard-earned hobby budget without sacrificing necessary stitch quality.
- Lighter And More Compact Than Bernette: When I transport my gear to weekend classes, I am always thankful for this machine’s highly portable form factor, which is noticeably easier to carry and maneuver than the bulky, overly heavy chassis typical of similarly priced Bernette hybrid machines heavily favored by traditional quilters and mature sewing enthusiasts.
- Better Screen Technology Than Entry Pfaffs: The brilliant, full-color responsive touch display easily outclasses the outdated, monochromatic pixelated screens still utilized on basic Pfaff models, allowing me to actually see a realistic, full-color preview of my digital files before committing to stitching them out permanently onto my expensive base garments and ruining the raw material entirely.
- More Accessible App Integration Than Husqvarna: Using the smartphone application to beam files directly over my home network feels completely modern and highly stable, unlike the often clunky, frequently disconnecting Bluetooth paired applications I have previously tested on similarly priced Husqvarna Viking beginner computerized models, giving me a much smoother and genuinely enjoyable software experience daily.
- Quieter Operation Than Most Cheap Competitors: The internal DC motor and balanced main shaft run surprisingly smoothly and emit a much lower decibel hum than the aggressively loud, clanking entry-level machines frequently found on big box store shelves, creating a much more peaceful and enjoyable audio environment in my dedicated sewing studio while I work alone.
- Broader Foot Compatibility Than Juki Models: I absolutely love how easy it is to find incredibly cheap, generic snap-on presser feet for this specific shank style on Amazon, whereas my attempts to accessorize basic Juki models always required hunting down highly specific, surprisingly expensive proprietary attachments from specialized dealers located completely across the globe.
Frequently Asked Questions (FAQ)
Is the Epson FastFoto FF-680W scanner any good?
Yes, it is widely considered exceptional for its specific purpose. It is recognized as the world’s fastest personal photo scanner, capable of scanning one photo per second at 300 dpi, making it incredibly efficient for digitizing massive physical photo collections quickly.
Is Epson FastFoto worth it?
It is absolutely worth the investment if you possess thousands of old printed photographs that need archiving. While the initial cost is premium, the sheer amount of time saved compared to using a flatbed scanner or paying a professional digitization service provides immense long-term value.
When was the Epson FastFoto FF-680W released?
This high-speed photo scanning system was officially released and made available to the public on January 22, 2019. It has remained a highly popular choice for memory preservation ever since its launch.
Is the Epson FF-680W wireless?
Yes, it features flexible wireless connectivity. You can easily connect the scanner to your home network via Wi-Fi, allowing you to scan directly to cloud services or your computer without needing a physical tether, though a standard USB connection is also included.
Conclusion: For Brother SE725 Vs. SE700
After spending extensive time evaluating both models, I can confidently say that you cannot make a bad choice here. Your decision ultimately depends on how you prefer to purchase your equipment and whether you value extra digital goodies. I personally appreciate the added value of the downloadable patterns that come with the exclusive bundle, but if you just want a reliable base machine, the standard version will serve you flawlessly. You have to evaluate your own project needs and decide if the exclusive extras are worth the hunt. I hope my hands-on breakdown has cleared up the confusion and helps you select the perfect automated crafting companion! Would you like me to help you find some beginner-friendly digitization software to pair with your new machine?

Jeffery Carlson
I am Jeffery L. Carlson and you know the drill! I write for you and if you interact with me, please feel free to comment on any post you like!