I have spent countless weekends in my garage surrounded by half-empty spray cans and rusted metal scraps trying to find the ultimate rust-preventative finish. In this article,
I will compare Tremclad and Rust-Oleum to determine which brand offers the best adhesion, protection, and long-term value for your DIY tasks. You will discover which paint performs better on bare metal and which one saves you the most time on preparation. My goal is to guide you toward a professional result that stands the test of time, weather, and wear.
A Brief Comparison Table
| Feature | Tremclad Performance | Rust-Oleum Performance |
| Market Presence | Dominant In Canada | Global Household Name |
| Formula Type | Oil-Based Enamel | Alkyd And Oil-Based |
| Adhesion Style | Direct-To-Rust Bond | Multi-Surface Specialist |
| Drying Time | Average (4-6 Hours) | Variable By Line |
| Best For | Old Rusted Metal | Versatile All-Around Use |
| Primer Need | Usually Not Required | Recommended For Best Results |
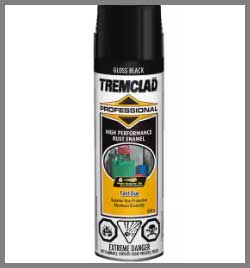
My Experience With Tremclad
I first encountered Tremclad while working on a vintage utility trailer that had seen better days in the harsh Canadian winters. The metal was pitted and orange with surface rust, and I honestly thought I would spend weeks sanding it down to the bare steel before I could even think about a color coat.
A neighbor suggested I try Tremclad because it was designed specifically for lazy—I mean, “efficient”—restorations like mine. I followed the instructions, gave the trailer a quick wire brush scrub, and sprayed it down. The way the paint soaked into the rust and created a smooth, semi-gloss shell was impressive. It’s a very forgiving product that seems to thrive on surfaces that other paints would simply slide off of.
Pros Of Tremclad
- Direct To Rust Adhesion: This paint is specifically formulated to bond directly to oxidized metal without the need for a separate primer layer in most cases. I have found that it saves me hours of tedious sanding and prep work on large, difficult-to-clean items like metal fences and old garden carts.
- Superior Moisture Barrier: The oil-based formula creates a thick, impenetrable layer that locks out oxygen and water, effectively stopping the chemical process of rust. I used it on a basement pipe that was constantly sweating, and the finish has stayed perfectly intact without any signs of bubbling.
- High Pigment Solids: Every can is loaded with a high concentration of solids that provides excellent hide and a very deep, rich color profile. I noticed that it covers dark metal remarkably well with just a single coat, allowing me to use fewer cans on larger projects like garage doors.
- Cold Weather Performance: This brand seems to handle applications in cooler temperatures much better than many other traditional oil-based paints I have tested. I have successfully sprayed it on autumn afternoons when the air was crisp, and the finish still leveled out beautifully without any grainy or orange-peel texture.
- Excellent Flow Control: The paint has a slightly longer open time, which allows it to flow together and erase any overlap marks from the spray nozzle. I find this particularly useful when painting large flat panels, as it creates a seamless, factory-like appearance that looks much more professional than most DIY sprays.
- Flexible Protective Shell: Once fully cured, the paint remains slightly flexible, allowing it to expand and contract with the metal as temperatures change. This prevents the coating from becoming brittle and cracking, which is a common failure point for many cheap spray paints used in extreme outdoor climates.
- Industrial Gloss Levels: The gloss finishes from this brand are incredibly shiny and have a high-end feel that rivals automotive coatings. I love using the high-gloss black on wrought iron railings because it gives them a sleek, expensive look that stays reflective even after years of direct sun exposure.
- Wide Availability In Canada: For my friends up north, this is the gold standard for rust protection and can be found in almost every hardware store. I appreciate that I can always find a matching can if I need to do a small touch-up on a project I finished years ago.
Also Read: Comparison of Superbox S5 Pro And Max
Cons Of Tremclad
- Extremely Long Cure Time: While it dries to the touch relatively quickly, it can take days or even weeks to fully harden to its maximum strength. I have accidentally left thumbprints in the finish of a project that I thought was ready for assembly, so you must be very patient.
- Prone To Runs: The formula is quite liquid and heavy, which makes it very easy to accidentally apply too much paint and create sagging. I have learned that you must use very light, almost misty passes to avoid the dreaded drips that can ruin the look of a smooth metal surface.
- High Solvent Odor: The fumes from this paint are exceptionally strong and can linger in a garage for a long time after the job is done. I always have to plan my painting days around the weather so I can leave the doors open and wear a heavy-duty respirator to avoid the smell.
- Limited Color Options: Compared to other major brands, the color selection is quite traditional and focused mostly on industrial and primary shades. I find it difficult to find modern, muted colors for interior decor projects, as the brand is clearly focused on functional metal protection rather than aesthetic crafts.
- Difficult Cleanup Process: Because it is a heavy oil-based paint, you need mineral spirits or paint thinner to clean up any spills or tools. I find the cleanup to be a messy and time-consuming task compared to water-based alternatives, which is something to consider if you are working in a finished space.
- Recoat Window Risks: If you don’t hit the specific recoat window, the new paint can cause the previous layer to “lift” and wrinkle. I have had to strip entire projects down to bare metal because I waited too long to add a second coat, which is a very frustrating and expensive mistake.
- Not For High Heat: This standard formula will discolor and peel if used on items that get hot, like engine blocks or grills. I made the mistake of using it on a fire pit once, and the paint scorched and flaked off almost immediately after the first fire, creating a huge mess.
- Nozzle Clogging Issues: If the can is not cleared perfectly after use, the heavy oil-based paint will permanently block the internal spray tip. I have had to throw away several half-full cans because the paint hardened inside the valve, making it impossible to get any more product out of the container.
Maintenance Tips For Tremclad
- Clearing The Straw: After every use, turn the can completely upside down and spray for three seconds until the mist turns clear. I do this religiously to ensure that no heavy paint remains in the internal straw, which prevents the valve from sticking and failing during your next project session.
- Solvent Tip Soak: If you notice the spray pattern getting weird, pop the nozzle off and drop it into a small jar of lacquer thinner. This dissolves any dried oil-based residue inside the tip, restoring the original spray pattern and saving you from having to buy expensive replacement nozzles for your cans.
- Avoid Direct Sunlight: When painting outdoors, try to work in the shade or on a cloudy day to prevent the paint from drying too fast. I have found that direct hot sun can cause the surface to “skin over” while the paint underneath is still wet, leading to ugly bubbles and surface craters.
- Shake For Success: You should shake the can for a minimum of three minutes to ensure the heavy rust-fighting resins are fully mixed. I have noticed that if I skimp on the shaking, the paint comes out thin and lacks the protective properties and color consistency that the brand is known for.
- Use Degreasing Agents: Always wipe your metal down with a wax and grease remover before you start spraying to ensure a perfect bond. Even if the metal looks clean, invisible oils from your hands or the manufacturing process can cause “fish-eyes” where the paint refuses to stick to the surface.
- Store In Warm Spaces: Keep your cans inside the house rather than in a freezing garage to maintain the proper internal pressure. I have found that cold paint doesn’t atomize well, resulting in a splotchy finish that requires much more sanding and rework than a warm, well-flowing paint would ever need.
- Light Sanding Prep: Even though it says “direct to rust,” a quick scuff with a wire brush or some medium-grit sandpaper helps the bond. I always spend five minutes knocking off the loose flakes of rust, as the paint is only as strong as the surface it is currently stuck to.
- Check Can Dates: Oil-based paints can settle and thicken over time if they sit on a store shelf for too many years. I always check the bottom of the can for a manufacturing date to ensure I am getting a fresh product that hasn’t started to separate or lose its effectiveness.
Comparison With Other Brands
- Versus Krylon Fusion: Krylon is the king of plastic, but Tremclad beats it handily when it comes to long-term metal protection. I would never use a thin craft paint like Krylon on a rusted trailer, as it simply doesn’t have the chemical bite or the thickness to stop corrosion.
- Versus Montana Cans: Montana is a dream for artists with its massive color range, but it is not built for harsh industrial environments. I prefer the heavy oil-based shield of Tremclad for my structural metal work because it offers a level of physical armor that artistic acrylics simply cannot provide.
- Versus Behr Spray: Behr makes a decent spray paint, but it lacks the specialized “Direct-To-Rust” reputation that has made this brand a staple. I still trust the old-school formula for anything that has already started to rust, as the chemistry behind it is specifically designed for those difficult, oxidized surfaces.
- Versus Dupli-Color: Dupli-Color is great for small automotive touch-ups, but it can be very brittle and prone to chipping on larger surfaces. I find Tremclad to be much more flexible, making it the better choice for items that experience vibration or temperature swings, like outdoor equipment and metal sheds.
- Versus VHT High Heat: VHT is essential for headers and manifolds, but it is too specialized and expensive for general yard work. For ninety percent of the metal items around my house, the standard rust-proof formula is more than enough protection and is much easier to apply without a complex curing process.
- Versus Generic House Brands: I have tried the “budget” rust paints from big box stores, and they almost always require twice as many cans. I have learned that the high solids content in a premium brand like this actually makes it cheaper in the long run because the coverage is so much better.
- Versus SprayMax 2K: SprayMax is an incredible professional tool, but it is a “one-and-done” can that you have to throw away after one use. For the average DIYer, the ability to use a little bit of Tremclad and save the rest for later is a huge advantage that makes it much more practical.
- Versus Plasti Dip: Plasti Dip is fun for changing colors temporarily, but it offers zero actual protection for the metal underneath. If you want to actually save your metal from turning into a pile of dust, you need a permanent, chemically bonded paint rather than a temporary rubberized coating.
My Experience With Rust-Oleum
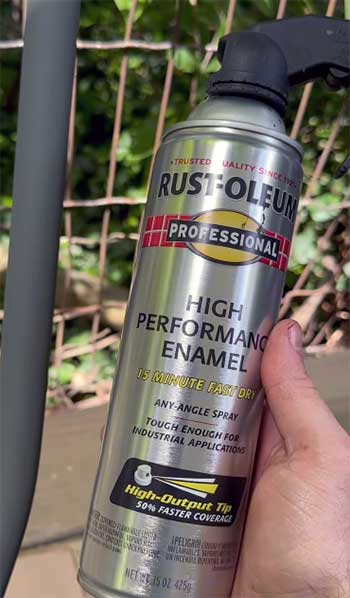
I have used Rust-Oleum on more projects than I can count, ranging from my kitchen cabinet hardware to the frame of my old pickup truck.
It is the brand I grew up with, and there is a certain level of comfort that comes with that familiar comfort-grip nozzle.
One of my favorite uses for Rust-Oleum is their “Professional” line in the large cans. I used it to paint a metal workbench in my shop, and the finish is so hard that I can drop tools on it without seeing a single scratch.
It’s a very versatile brand that offers a specific solution for almost every material, which makes it my “default” choice when I’m not sure what to buy.
Pros Of Rust-Oleum
- Massive Product Variety: This brand has a specialized can for almost every niche imaginable, from high-heat stove paint to glow-in-the-dark effects. I love that I can stick with one brand and find a specific formula that is perfectly tuned for the exact material I am currently working on.
- Innovative Nozzle Designs: Many of their cans feature an ergonomic trigger or a comfort-grip tip that prevents finger fatigue on large jobs. I have spent hours painting a massive metal fence, and my hand felt fine afterward, which is a major benefit over the old-school standard spray buttons.
- Superior Finish Hardness: Once fully cured, the “Professional” and “Stops Rust” lines create an incredibly hard surface that is very resistant to physical damage. I use this for high-wear items like floor jacks and shop stools because I know the paint can handle the daily abuse of a working garage.
- Fast Drying Options: Their “Painter’s Touch 2X” line is designed to dry much faster than traditional oil-based paints, allowing you to finish projects in record time. I find this incredibly helpful when I am doing a quick interior project and want to bring the item back inside before the sun goes down.
- Excellent UV Stability: The pigments used in their premium lines are very resistant to fading, even when exposed to the intense summer sun. I have painted plastic shutters and outdoor decorations that still look brand new after several years of exposure, proving the quality of their chemical formulations.
- Great Self-Leveling: The paint flows out beautifully after it hits the surface, which helps to hide minor imperfections and creates a very smooth finish. I have achieved glass-like results on metal table tops by simply following the instructions and using the right overlapping technique with my spray passes.
- High Pressure Consistency: The propellant in these cans is very strong and consistent, which leads to a very fine and even atomization of the paint. I rarely experience “spitting” or uneven bursts of paint, which is essential for getting a professional-looking finish on smooth, reflective surfaces like metal or glass.
- Global Reliability: Because they are such a huge company, the quality control is excellent, and you can find their products almost anywhere in the world. I appreciate that I can watch a tutorial online and be certain that the exact can of paint they are using is sitting on the shelf at my local store.
Cons Of Rust-Oleum
- Can Be Expensive: You definitely pay a premium for the brand name and the specialized nozzle technology compared to generic alternatives. For very large projects requiring dozens of cans, the cost can add up quickly, making it a significant investment for a simple DIY home improvement task.
- Complex Product Lines: With so many different “sub-brands” like Universal, Painter’s Touch, and Stops Rust, it can be very confusing to know which one to pick. I have spent a lot of time standing in the paint aisle reading labels just to make sure I wasn’t accidentally buying a plastic paint for a metal job.
- Strong VOC Emissions: Many of their most durable paints are high in volatile organic compounds, which means they have a very strong and lasting smell. I find that I have to be very careful about where I spray, as the odor can migrate into the house if the garage isn’t perfectly sealed.
- Overspray Issues: The high pressure that helps with atomization also tends to create a lot of fine “paint dust” that can drift onto nearby objects. I have had to learn the hard way to cover everything within ten feet of my workspace, as the fine mist travels much further than I initially expected.
- Strict Temperature Sensitivity: If it is too cold or too humid, this paint can take forever to dry or may even stay tacky for days. I have had several projects fail because I tried to squeeze in a paint job on a rainy day, resulting in a finish that never quite hardened correctly.
- Nozzle Clogging On Universal: Their “Universal” cans with the built-in trigger are notorious for clogging if you don’t use the whole can at once. I have had to toss several expensive cans because the trigger mechanism became gummed up with dried paint, which is a frustrating design flaw in an otherwise great product.
- Requires Specific Primers: While some are all-in-one, their best-performing rust paints still require a separate primer for the most durable results. This adds another step and another cost to your project, which can be annoying when you just want to get the painting part over with quickly.
- Heavy Coat Dangers: Because the paint covers so well, it is tempting to go heavy, which almost always leads to drips and an uneven texture. I have ruined several nice finishes by being too impatient and trying to get full coverage in a single thick pass instead of doing the work properly.
Read More: Comparison of Tozo T6 And T10
Maintenance Tips For Rust-Oleum
- Trigger Cleaning Hack: If you are using the Universal cans with the trigger, always wipe the nozzle tip with a wet rag after you finish spraying. This prevents a tiny “crust” of paint from forming over the opening, which is the number one cause of the spray pattern becoming irregular or stopping entirely.
- Intermittent Shaking: Don’t just shake the can at the start; give it a quick ten-second rattle every time you pause to move your project around. I have noticed that the heavy metallic pigments in some of their specialty colors can settle surprisingly fast, leading to an uneven color toward the end of the can.
- Distance Control: Maintain a consistent distance of ten to twelve inches from the surface to ensure the paint atomizes correctly before it hits. I have found that getting too close is the fastest way to cause drips, while being too far away results in a “dusty” finish that feels like sandpaper to the touch.
- Use Tack Cloths: Before you spray your final coat, wipe the surface with a tack cloth to remove any fine dust or lint that settled during the drying process. I find this step to be the difference between a “good” DIY job and a “professional” result that looks like it came out of a clean-room paint booth.
- Humidity Checks: I always keep a small weather app open to check the humidity levels before I start a big project in my garage. If the humidity is over sixty percent, I wait for a better day, as excess moisture in the air is the enemy of a smooth, glossy, and perfectly cured paint finish.
- Can Storage Tips: Always store your cans in a vertical position to prevent the paint from settling against the valve assembly inside. I have found that cans stored on their side are much more likely to develop leaks or have issues with the propellant when you finally go to use them again months later.
- Nozzle Swapping: If a can starts to act up, don’t be afraid to swap the nozzle with one from a known good can you just finished. Sometimes a tiny piece of debris can get stuck in the tip, and a quick swap is the easiest way to determine if the problem is the nozzle or the paint itself.
- Thorough Mixing: Listen for the “rattle” of the mixing ball and keep shaking for a full minute after you first hear it to be safe. I have had cans come out clear or streaky because I was too lazy to shake them properly, which wastes paint and requires me to sand the whole project back down.
Comparison With Other Brands
- Versus Tremclad: This is the classic rivalry, especially in Canada, where it comes down to adhesion versus variety. I choose Rust-Oleum when I need a specific finish like hammered metal or high-heat resistance, as their catalog of specialty products is much larger than the more focused Tremclad line.
- Versus Krylon Quik-Dry: Krylon is much faster for small house projects, but it doesn’t have the “Professional” grade durability of this brand. When I am painting something that will be outside in the rain and sun, I always reach for the Rust-Oleum label because I know the resins are built for heavy weather.
- Versus Valspar: Valspar offers some beautiful colors, but I have found that their nozzles are much more prone to spitting and leaking. I prefer the reliability of the Rust-Oleum spray system, as it gives me more confidence when I am painting a high-visibility item like a front door or a kitchen chair.
- Versus Montana Black: Montana Black is high-pressure and amazing for covering large walls quickly, but it is too messy for fine furniture. I find Rust-Oleum to be the better “all-arounder” for the average homeowner because it provides a more controlled spray that is easier to manage in a small workshop.
- Versus SprayMax 1K: 1K clear coats are great, but they don’t offer the same built-in rust protection that you get with a dedicated metal paint. I prefer using a single can of Rust-Oleum Stops Rust for my garden tools because it is simpler, cheaper, and provides all the protection I need in one step.
- Versus Store Brands: Generic paints often use cheaper propellants that run out before the paint does, leaving you with a half-full can you can’t use. I have never had this happen with a name brand like this, which makes it worth the extra few dollars for the peace of mind alone.
- Versus Liquitex: Liquitex is wonderful for indoor art, but it will peel off of metal in a heartbeat if it gets wet. For any functional item, you need the solvent-based strength of a brand like Rust-Oleum to ensure that the paint stays put through the heat, the cold, and the humidity of real life.
- Versus Ironlak: Ironlak is a great artist brand, but it can be very difficult to find in local hardware stores when you run out mid-project. The ubiquity of Rust-Oleum is a huge pro, as I know I can always run to the store five minutes away and grab another can that will match perfectly.
Frequently Asked Questions (FAQ)
Both are actually owned by the same company, but Tremclad is the go-to for “direct-to-rust” applications in Canada, while Rust-Oleum offers a much wider variety of specialty finishes globally.
In most cases, no, as Tremclad is specifically formulated to bond to rusted surfaces without a primer, though a primer will always provide a slightly smoother and more durable final finish.
Rust-Oleum’s “Professional” and “Automotive” lines are generally better for cars because they offer higher durability and a finish that is more resistant to gasoline and road chemicals.
Yes, as long as the Tremclad is fully cured (usually after 48 hours), you can spray Rust-Oleum over it, though you should always do a small test patch first to ensure the solvents don’t react.
Conclusion
I have broken down the battle between Tremclad and Rust-Oleum to show you that both brands deserve a spot on your workshop shelf for different reasons. Whether you need the brute-force rust-fighting power of Tremclad for an old iron fence or the professional versatility of Rust-Oleum for your household furniture, you now have the insights to choose correctly.
You should always weigh the specific needs of your surface against the dry times and finish options available before you start your next project.
I personally switch between the two depending on whether I’m in a hurry or if I’m dealing with a heavily oxidized piece of scrap metal. You will find that when you respect the preparation and the chemistry of these paints, your DIY results will look better and last much longer than you ever imagined.